
The new year started off busy for my photography. I had 3 photoshoots within 3 weeks, two were pretty run of the mill portrait shoots. The last was a fitness photoshoot and this was the one I was really looking forward to, it would give me a chance to get more creative with my lighting. Sure you might argue that spending a few hours shooting a beautiful lady doesn't hurt either and you'd be right :)
Initially the woman contacted me through my website inquiring about how much I would charge. After thinking about it for awhile I decided to call her and tell her I would shoot it for free with the caveat that I have creative control and use of the images after (ie "time for cd" essentially). She told me she had started training really hard and even though she was a shy person she wanted to get some photos for herself while she was in peak shape. There is also a magazine called Oxygen in which people can submit photos along with a story of their journey which she was thinking of submitting some photos to. I knew right away that if I was going to do this shoot to the level I wanted to then it would be way above most sane people's budgets. My city isn't exactly flooded with jobs that interest me, a few years ago I decided that if it means shooting for free every once in a while so I can work on shoots I actually like doing then so be it.
Enough about the background, let's talk about the shoot. I had the option to shoot either at her gym or my friend's mixed martial arts gym "Way of the Dragon". Since I'd already shot there before and I knew the owner David Mah would be pretty flexible when it came to shooting times I opted to go there.
The gym is quite large with a lot of open space to work with so I decided I'd setup a roll of white seamless along one wall and then setup later in the middle so the light would fall off and give me a black background. The fitness model had also explained to me that for people who compete there are multiple classes (bodybuilding, figure, fitness, and bikini) and that she would fall into the fitness and bikini classes. In light of this we opted for two wardrobes, one being simple "Under Armour" style workout clothes and the other being a bikini. She had shown me reader submitted images in Oxygen magazine as an example of what she was after, these shots while OK were very even lighting and I didn't feel they were highlighting the toned muscles. I told her we'd start with those and make sure we got some she liked and then venture into more dramatic lighting.
Simple even lighting, two softbox umbrellas at 45° with 1:1 ratio
We were quickly able to get a variety of shots that looked like they'd be quite at home with the photos she showed me from the magazine. She was quite photogenic so this was easy.
As I eased into more dramatic lighting I simply moved both softbox umbrellas so that each one was on either side of her and shooting directly at her. This starts to highlight the muscles much more clearly, having her turn her head to face one of the softboxes kept the nice soft light on her face.
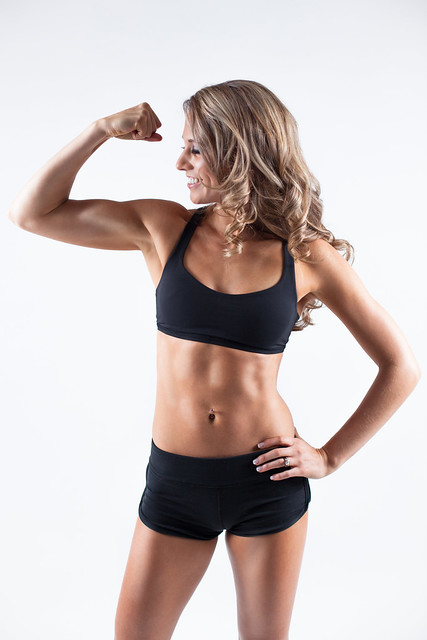
Side lighting starts to reveal definition, still at a 1:1 ratio
Next I opted to remove one of the softboxes (camera left) and replace it with a gridded snoot. This yields much more contrast, harsh light coming in from the left and soft light from the right. I cannot remember exact power levels but due to the modifiers it's apples and oranges anyway, since I already had the one softbox dialed in I simply had to tweak the gridded snoot to achieve the light I wanted.
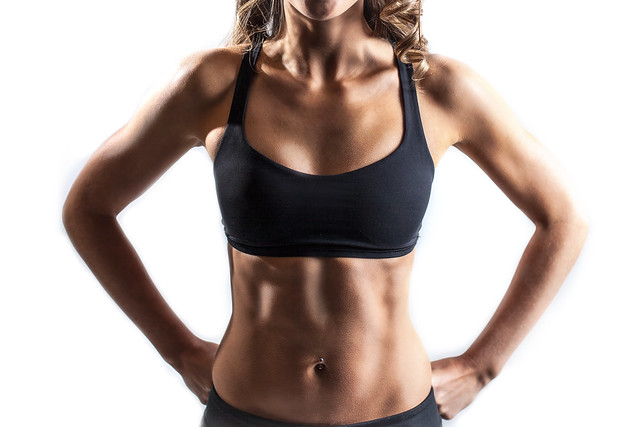
Gridded snoot on camera left, softbox camera right
As we shot I'd show her a few of the shots and explain what I was trying to accomplish with each lighting change. She was quite amazed at just how drastically a few minor changes could shape and change the resulting image.
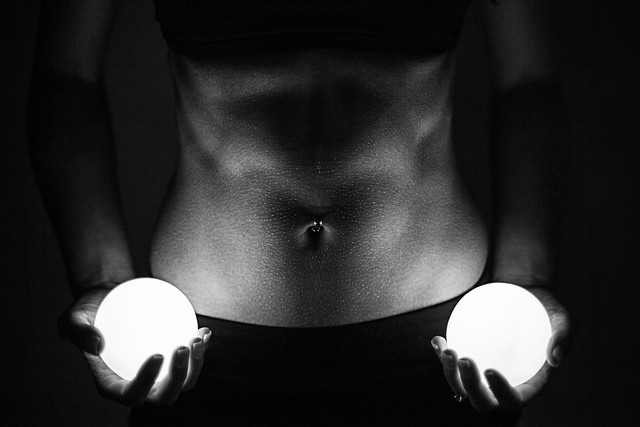
Before switching backgrounds I wanted to try out some LED "orbs" I'd ordered from China last year. Initially I'd picked them up for a nude bodyscape shoot I'd had planned but ultimately did not happen due to a family crisis that came up a week before the shoot was scheduled. I had no idea how much light these would provide in front of the camera but I knew I'd be pushing the ISO pretty high. The resulting light was incredibly dim and horribly blue :) Cranking the ISO took care of the first issue, white-balance in Lightroom easily handled the second. Canon is known for poor low light focusing and this was no exception but we managed alright.
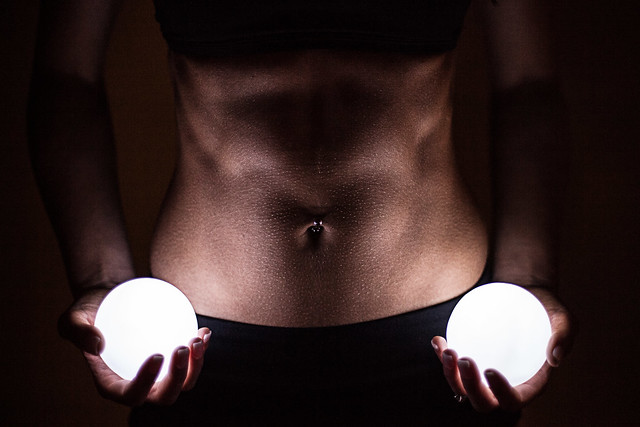
No flash, just cheap Chinese LED "orbs" from ebay and ISO 1600
Before switching wardrobes we made use of some of the gym elements that we had at our disposal. When your subject is in a painful position you have to dial in your light quickly, luckily I only had to get her to do a few takes on the pull up bars :)
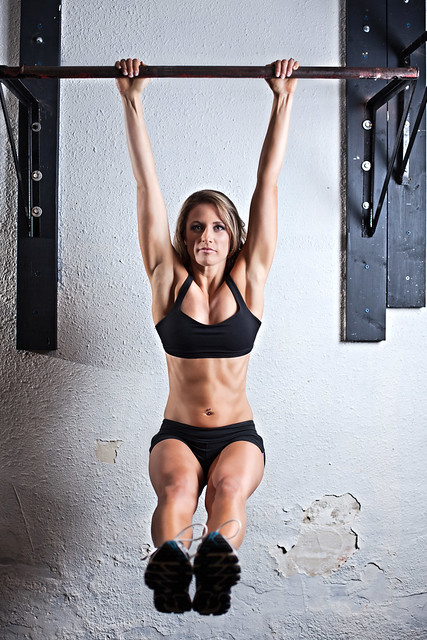
Gridded snoot on camera left, softbox camera right
Next we switched to the middle of the gym and the wardrobe changed to the bikini. My softbox umbrellas were yielding too much spill so I setup my 28" Westcott Apollo which is recessed a bit. There was still a little spill that was lighting up support pillars just faintly but that was easily removed in post.
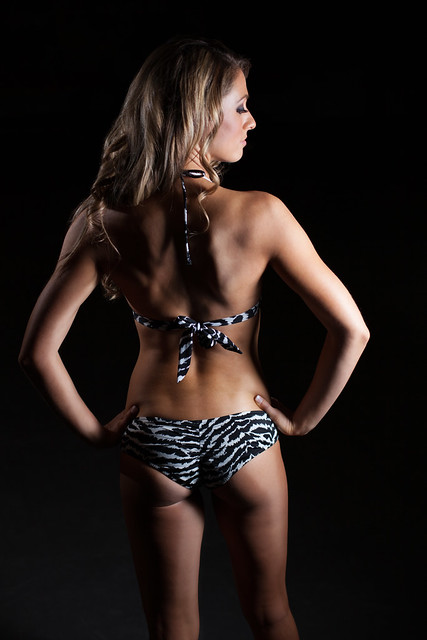
No backdrop at all yields a nice deep black. Gridded snoot camera left, Westcott Softbox camera right.
We switched back to the white backdrop and she used some oil to really help add to the muscle definition. In hindsight we should have been using the oil from the start because it really helped. As I was editing I started to tire of the plain white background so I started to include variations with a bit of texture as well.
Keeping with the harsh light of the gridded snoot on the left and the softbox on the right
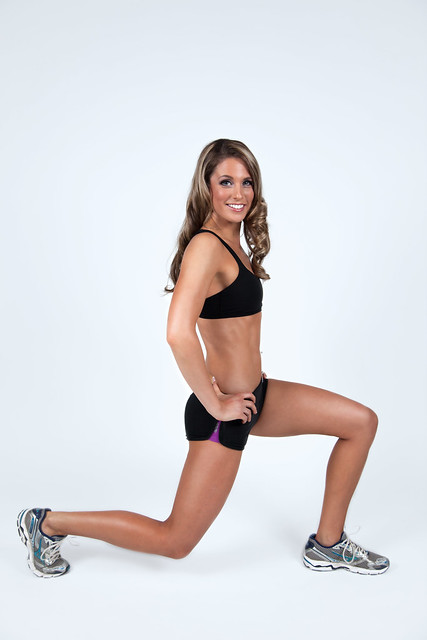
One of the magazines she had brought along had an image of a girl posting against a brick wall that she quite liked. I laughed because I had shot a virtually identical shot last year during my downtown "guerrilla style" photoshoot. The gym had a cinderblock wall though with an interesting texture so for fun we recreated the shot from the magazine.
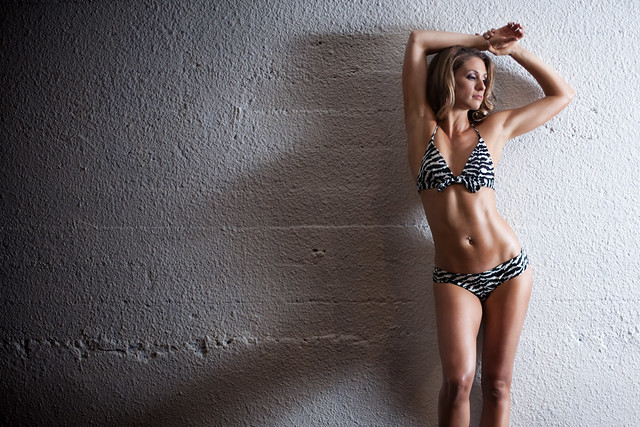
Textured walls are great when side lit. Solo softbox umbrella camera right.
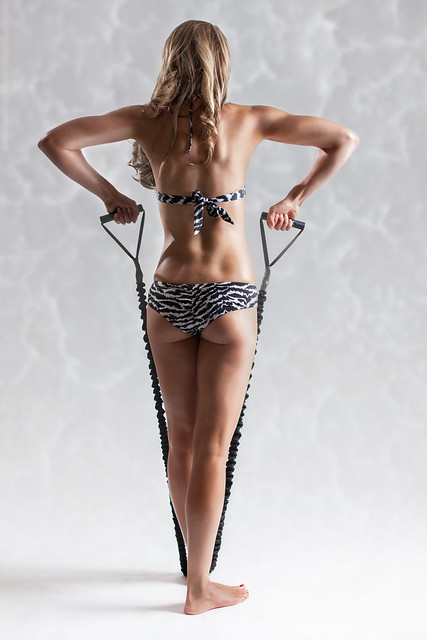
The gym we were shooting in also had a boxing ring which I initially planned on making more use of. We'd already been shooting for 2 hours though and we were both getting tired so instead we decided to shoot a few jump rope shots with the ring as the backdrop. We managed to get the timing perfect for a few shots with her up in the air as the rope passed beneath her feet.

Gridded snoot camera left, softbox camera right
All told I wound up with about 400 images which I then pared down to ~100 for editing. In hindsight doing two backdrops and two wardrobes resulted in just too many images I liked and wanted to see how they'd look finished. Normally I try to limit myself to 30 for editing. In total I spent about 40-50 hours editing and retouching the photos, perhaps in a future post I'll walk through my process and explain that a bit more.
The model was quite happy with the resulting images and so was I. If she winds up sending some photos into Oxygen and she gets published I'll update this post!
Gear:
Canon 5DMKII
Yong Nuo 460 MKII (x2)
Cactus V5 wireless triggers
Steve Kaiser Softbox Umbrella (x2)
28" Westcott Apollo Softbox
Gridded snoot (homemade)