Monday, December 6, 2010

Help Portrait 2010 Update

Photo credit to Dustin

UPDATE: Just wanted to throw in a special thanks to Costco photo lab for coming through with a deal on prints to help us out!

Well Saskatoon's first year participating in the Help-Portrait event is over and it was a huge success. We had 7 photographers and 10 other volunteers on site that day including a makeup artist! In total we had 71 groups sign up ranging from individual people to large families, all total we had 105 people get their portraits taken. Not bad for a handful of photographers, especially considering that this was the first time some of the photographers had worked with studio lighting.

As I'm writing this we're still waiting on some people to finish the post processing work on their shots, from what I've seen of the finished files they all look great! On the 11th we're hoping to have all of the photos ready and are going to be down at the Salvation Army handing them out, I can't wait to see everyone's reactions.

Our shoot started at 10:30am Dec 4th and went until 4pm. We ran two setups, one using my Impact 5x7' collapsible background that could accommodate 1-2 people and another larger setup using a fabric backdrop for individuals or big groups. We split up my two studio strobes, one for each setup, then used speedlights on each for secondary lighting. For triggering we used my Yong Nuo PT-04 Transmitter/Receiver sets on one side and PW's provided by another volunteer for the other side (thanks Jay!). All in all we didn't have any real issues, maybe a few minor things here and there but nothing big.

Behind the scenes shots from the day's event can be seen here at the Saskatoon group's page on Flickr and BTS shots from worldwide participants here.

In an effort to document some ideas while they're still fresh here are some things to consider for next year.

Things that worked really well:
  • Each person/group coming in to have their portraits taken were given a number on a small piece of paper, for their first photo they held this up so we could match pictures to the appropriate people.
  • Props, only one of our volunteers was on the ball in this department and she brought a huge teddy bear along with other props. These really helped and were a great idea, thanks Kim!
  • Dropbox. This is a great way for groups of people to collaborate and share files. So far everything is going good, just hope we don't run out of space ;)
  • The flyers that were handed out at the Salvation Army during the two weeks before the event really seemed to help get the word out and to the right people. Announcing stuff on the radio/TV ahead of time is likely to result in the wrong people taking advantage of the event whereas these flyers hit our target market perfectly.


Things that could be improved upon:
  • Backdrops, since it was our first year and we didn't know what to expect we thought one setup for small groups and one for large groups would work. We ended up with a lot of larger groups so this made it uneven, next year we'll just setup two large backdrops. Also I think that 2 studio strobes per side would probably work better especially if we're having larger groups (sorry Krystian you were right lol).
  • ID number slips, while they did work out really well one thing I'd suggest for next year is having them underlined. We had one incident where the person held a 9 upside down so it appeared to be a 6. The issue was quickly sorted out since we had names to match the numbers up with, since one was male and one was female it was easy to figure out.
  • Bring a whiteboard to keep track of how many sittings each photographer has shot. All in all it worked out fairly evenly for us, I think everyone got to shoot enough. Still it would have been easier if we had a whiteboard so that nobody got left out. On the other hand everyone is different and some people might only want to shoot a certain amount, it depends on each person's comfort level.
  • Bring a hotshoe adapter for Sony/Minolta cameras or figure out before hand if one is going to be needed. One of the photographers at our event was shooting a Sony and was stuck bouncing her speedlight off the roof instead of being able to take advantage of the lighting setup.
  • Fund-raise and seek out sponsors earlier. This was our first year and the majority of members didn't join until there was a month or less left before the event so we did pretty good despite that. Now that we have a base of support next year we'll be on the ball earlier.
  • Krystian (our lead organizer) suggested shooting in pairs and having another photographer aid in reviewing the shots as they were taken. This would help avoid surprises later during post ie Oh crap I shot a group at f2 and only the people in front are in focus ;)

All in all it went very well and I can't wait to see everyone's reactions when we give them their photos this Saturday. Thanks to everyone that volunteered and a big thanks to Krystian and his wife Aleksandra for starting this Saskatoon group rolling.

Monday, November 15, 2010

Use your talent to give back - Help Portrait 2010


I just thought I'd make a quick post about this really cool event called Help-Portrait. So what is Help-Portrait? Well it's a bunch of photographers getting together, in whatever town you're from, and going out into the community and doing portraits of people who might not ordinarily get portraits. These people could be the homeless, low-income seniors, single-parents and their kids etc. Afterwards you print out the photos and give them to the people you've shot. Check out their website, they've got some really inspiring videos about last year's wildly successful campaign.

It may not sound like much at first but it's amazing how much something as simple as a good photo can improve ones self esteem and the way they look at themselves.

The event for this year is supposed to take place Saturday December 4th so if you're interested in taking part head over to http://help-portrait.com and signup, then do a search to see if there is already a group for your city.

Saskatoon's got a group this year and we're busy trying to figure out all of the details, if you want to get involved signup at the website and join the Saskatoon group!

I'll post a follow-up after Dec 4th hopefully with some pics and behind the scenes stuff.

Monday, August 30, 2010

My camera takes crappy pictures, what should I buy?

I've been asked this question numerous times, normally I refer people to this earlier post but I figured I'd rehash the issue and provide some more info.

Essentially it boils down to
a) what exactly are they unhappy with in their current camera
b) what is their budget and
c) is camera size a crucial aspect?

Most of the time when people say they aren't happy with their current camera it due to one of 4 things:
1) Poor lowlight capabilities
2) Poor zoom
3) Pictures aren't sharp enough
4) Too much lag when the shutter is pressed

I'll cover each of these issues and explain why they happen and which type of cameras are affected the most and least.

Common complaints:

Poor lowlight:
All cameras whether film or digital suffer in this environment, photography needs a lot of light because after all we're capturing photons here hence photography ;) In the digital realm it really all boils down to sensor size, the larger the sensor the bigger the "footprint" available for the light to hit. Its like running outside in the rain to collect water, the person with the biggest container is going to get the most water. Point and shoot cameras are immediately at a disadvantage because of their size, smaller body = smaller sensor. If you're dead set on owning a point and shoot you're only real option is to use that nasty on-camera flash to create more light. Digital SLR cameras, having larger sensors, tend to work better than their diminutive point and shoot cousins in this environment. They are still not perfect but they offer a very noticable improvement. At the time of writing this one of the best low-light dSLR's in the entry level range is the Canon Rebel T2i ($979 with 18-55mm kit lens at Don's photo) which yields very acceptable images up to ISO 800. There are more expensive dSLR's with larger sensors (full frame sensors) but these are really out of the price range of most people ($3000+ for just the camera without lenses).

Image sensor sizes, the smallest shown are point and shoot sensors


Poor Zoom:
Once again the point and shoot camera is being dealt a poor hand right of the flop, their small size physically limits the amount of zoom that can be available. Ignore any claims about digital zoom, this is not real zoom at all, it’s the same as blowing it up on your computer and you'll result in a blurry image. Optical zoom is the important number here, 3-5x optical zoom is fairly standtard within the realm of point and shoot cameras (P&S's from hereout) with a few touting 7x optical zoom. When you start going above this range, up to say 14x zoom, you leave the P&S realm and get into the mid-sized "bridge" or "prosumer" cameras. They call them bridge cameras because they bridge the gap between P&S camera and full fledged dSLR's. I tend to tell people to avoid these cameras, the reason is that about 4 out of 5 people that buy them are upgrading because of an interest in photography and end up buying a dSLR soon after anyway. I say skip that expensive step and just go for a dSLR, the size isn't that much bigger than a bridge camera and prices in some instances can be roughly the same. For those scared off by dSLR's because of all of the extra features don't worry, there is still "auto" mode and as you feel more confident you can explore the manual features to improve your photos even more. Lastly with a dSLR you can change lenses so if the kit lens that it comes with isn't enough you can buy a telephoto zoom that suits your needs.

Example of a "bridge" camera, for the most part I say skip these and look into dSLR's which will start at close to the same price.

Pictures aren't sharp:
Most often this complaint is less the camera's fault and more operator error when it comes to image quality. Even though digital cameras are common place now its surprising how many people don't realize you should always press the shutter halfway first, let the camera focus and determine exposure, then press fully. If this isn't done photos are often blurry because you're rushing the camera, often the autofocus doesn't have time to detect a face instead of the background (though this is improviing). Sometimes poor images are due to low light situations like we covered above. Point and shoots are mainly meant to yield nice 4x6 shots, that’s not to say if shot properly they couldn't provide bigger enlargements, but in the end they are made for capturing friends and family more than they are for fine art prints you'd blow up and frame in your livingroom. A station wagon is a station wagon and a sports car is a sports car, they are two different classes and are meant to do two different things, don't set your expectations too high. With the digital era people started viewing their photos on computers, immediately they began viewing them at 100% size and used this to judge image quality, while this is a valid method in some instances really what you should be doing is viewing it at the desired print size. For example a 12MP camera will snap a picture at roughly 4272 x 2848 pixels, this equates to a 14" x 9.5" print at 300dpi (just divide the pixels by 300), most point and shoot cameras when printed or viewed at 100% or maximum size won't yield the nicest quality. If you take the same image and view it at 1200 x 1800 pixels or 4x6 size they image will probably look much better. The truth is that most of the cameras out there are perfectly fine when it comes to image quality when judged by the print sized they'll most likely be used for. The problem is that manufacturers kept making them with higher and higher MP ratings when the sensor itself shouldn't really have that many and didn't need it if you look at what they're going to be used for. In truth anything above a 7MP camera for a point and shoot is really a waste, 7MP will let you make 8x10's at photo quality and can be pushed up to 11x14 in many instances, most people never even make enlargements at these sizes anyway.

Laggy shutter times:
Buy a dSLR. Period. Sad but true even with the most expensive P&S and bridge cameras you're always going to run into shutter lag. Even dSLR's when used in automatic mode will have some amount of lag as it autofocuses and adjusts the exposure however the time it takes to do it will most likely a lot less. Some cameras are worse than others and they way that you use your camera will affect this as well. As mentioned earlier pressing the shutter half way to "prep" the focus and exposure will significantly reduce any lag. Use of a flash can have a huge impact on this as well since it takes time for the flash to charge.

So what should I do?
It depends on a few things. After reading this do you still think you need a new camera? If the answer is yes then you'll need to see if what you want out of a camera is possible given your budget.

Buy another point and shoot?
The only time I'd recommend this is if you have a camera that wasn't made by a reputable name (ie Canon, Nikon, etc), if you're looking for new features like HD video, or if your camera was just really old (2MP for example). There are a few brands out there that have really crappy point and shoot cameras and you wouldn't expect it from the name, Polaroid for example makes terrible digital cameras, Olympus also has left a lot to be desired upon entering the digital arena. As far as MP's go I always tell people not to get to carried away with it but realistically if you're still shooting a 2-4MP camera an upgrade may be desireable. Another acceptable reason would be if your current point and shoot has very limited zoom or no optical zoom at all, in this case you may want to look at a better point and shoot or upgrade to a bridge or dSLR.

Should I look into these bridge/prosumer cameras?
Maybe. This is a really tricky area because they are really not that much cheaper than an entry level dSLR and only slightly smaller. If you think you may be considering a dSLR in the future you should definitely skip this range and hold out for a dSLR. If you're strictly looking for a bit more zoom and some added controls then perhaps a prosumer or bridge camera is precisely what you're looking for, my only advice is give it some serious thought before taking the plunge.

Should I just go all in and get a dSLR?
If you're wanting better photos, don't mind a bit larger camera, and can afford it then unequivocally YES. There are just so many advantages to a dSLR and due to their increasing popularity you can buy amazing cameras for very low prices. Ten years ago consumer level dSLR's didn't even exist, in late 2003 Canon came out with the first one for a resonable price ($1500) and it was 6.3MP. Today you can get an 18MP dSLR capable of full 1080P HD video for under $1000 and a resectible 10MP for $549 with a lens. Plus you can still keep your old P&S for snapshots ;)

Some example cameras from each class

Prices accurate as of Aug 30 2010

Point & Shoot

Canon Powershot SD1400IS ($249)
Pros: Very small and portable, Surprisingly crisp HD video (720p)
Cons: Only 4x optical zoom, can't use optical zoom when recording video

Canon Powershot SD780IS (Low prices if you can still find it in stock, its last years model but virtually identical to the SD1400IS)

Pros: Very small and portable, Surprisingly crisp HD video (720p)
Cons: Only 4x optical zoom, can't use optical zoom when recording video

Canon SX120IS ($229)
Pros: 10x optical zoom (very high for a P&S)
Cons: No HD Video (still has SD video though), Large for a point and shoot

Sony Cybershot DSC-H55 ($269)
Pros: 10x optical zoom (very high for a P&S), HD Video (720p)
Cons: Uses expensive proprietary Sony Memory sticks for the storage medium

Nikon Coolpix S8000 ($279)
Pros: One of the smallest cameras sporting 10x optical zoom, HD Video (720p)
Cons: No optical zoom while recording video

Bridge / Prosumer cameras
Canon Powershot G11 ($549)
Pros: All the controls of a dSLR, solid build, almost the industry standard camera for journalists
Cons: No HD video, only 5x optical zoom

Canon Powershot SX20IS ($449)
Pros: 20x optical zoom, HD Video (720p)
Cons: Lack of RAW support, slow lens at telephoto range (ie aperture is smaller letting in less light)

Panasonic Lumix DMC-FZ100 ($549.99)
Pros: 24x optical zoom, Full 1080p HD video, Leica lens
Cons: Electronic viewfinder could stand to be higher resolution

Fuji Finepix HS10 ($499)
Pros: 30x optical zoom, Full 1080p HD video
Cons: Slow processing of RAW format images

Digital SLR cameras

*Unlike the rest of the cameras I've listed above I'll include the MP rating for the ones below since the larger sensors actually make it a legitimate spec. Keep in mind that even 7MP will yield a crisp 8x10 print so unless you're planning on making posters you should still avoid getting too caught up in this rating. One caveat is that higher MP will allow you to crop a photo more and still retain detail.

Canon Rebel XS 10MP ($549 with an 18-55mm kit lens)
Pros: Solid entry level camera for a low price
Cons: No video capabilities, 10MP (which is still not bad)

Canon Rebel T2i 18MP ($979 with an 18-55mm kit lens)
Pros: High value for money, Full 1080P HD video, High MP for the price
Cons: Price may be above an entry level budget

Nikon D3000 10MP ($499 with an 18-55mm kit lens)
Pros: Solid entry level camera for a low price
Cons: No video capabilities, 10MP (which is still not bad)

Nikon D90 12.3MP ($999 with an 18-55mm kit lens)
Pros: Wildly popular, first dSLR to allow HD video shooting
Cons: Video is only 720p, price may be above an entry level budget

Sony Alpha A230 10.2MP ($399 with an 18-55mm kit lens)
Pros: One of the most inexpensive dSLR's, allows shooting to SD card as well as memory stick
Cons: No video recording, hotshoe is non-standard and may require adaptors for use with non-sony/minolta flashes

Pentax k-x 12.4MP ($629)
Pros: Compatible with almost all Pentax lenses, burst rate of 4.7 frames per second
Cons: Video is only 720p, no HDMI port

But wait!
Before you go running out the door to drop your hard earned cash on a new camera I recommend doing the following. Leave your cash/cards at home and go window shopping first, if at all possible try the camera out in the store and see how it feels. Write down a list of cameras you're interested in, when you get home scour the internet for reviews on them and see if there is any hidden flaws you didn't notice. Dropping a few hundred bucks or a grand is a big deal and you should be sure of what you want before you drop that kind of cash. I'd also recommend holding off on buying all sorts of accessories for the first week or so while you try out the camera at home, this way you can still return it without getting stuck with a bunch of accessories.

Good luck ;)

Sunday, August 22, 2010

Break from digital : A vacation to film land

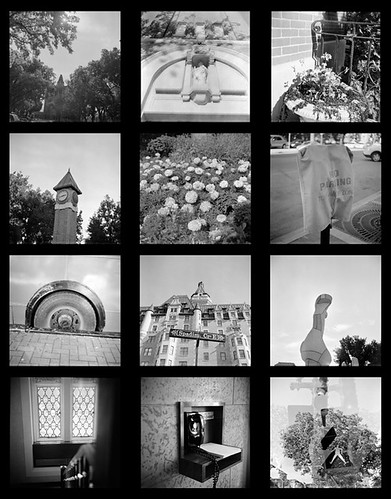
Lubitel II Set1 - Index

I don't think I've really mentioned it much (if at all) here on my photo blog but I collect old and unique cameras. Every once it awhile I'll put down my digital cameras and pick up one of these to head out for a little film fun.

The majority of the older cameras I have are medium format TLR's and the odd box camera, there are a few 35mm exceptions like my elegant Werra 3 and the low fi Smena 8M.

It is when I have these cameras in hand that I remember how exciting taking photos was when I was a kid. Each frame was precious because you only had a finite number, no erasing unwanted photos or memory cards that allow for thousands of photos. There was always that feeling of anticipation as you waited to get the photos back from the lab wondering "did they turn out?" Or in some cases "I have know idea what's even on this roll" lol. The kids growing up in the digital age missed out on this (I feel old saying that and I'm only 29), don't get me wrong I love what digital sensors have given us in photography but it's also taken something away.

Today reminded me of that era and gave me a glimpse of that old excitement when I saw this camera while surfing the web:
(Photo from www.japantrendshop.com)

It's the Superheadz Blackbird Fly, a new 35mm TLR that hails from Japan. Other than Seagull I don't think any other company is producing new TLR cameras, sure there was that digital Rollieflex a few years back but at 2MP it was more of a joke than a real camera. These little Blackbird Fly's (aka BBF) are a little pricey at a touch over $100 but are cheaper than the medium format Seagull TLR. I like the fact that they shoot the readily available 35mm film, it's a little easier on the pocketbook compared to spending over $1 per photo with 120 film not counting the film itself. If you're shooting MF because of the higher detail negatives you're most likely shooting on a MF SLR or a higher end TLR anyway so 35mm makes sense for those of us just looking for some fun.

If you are however interested in the medium format route you can get into it on a fairly low budget. The Holga 120N is a cult classic in the field of lomography and can be had for under $50 if you look hard, Diana's (the inspiration for the Holga) are also still available and fit a shoestring budget. Some vintage cameras can be found on ebay or in your local antique shops, the Lubitel II and 166B made from bakelite instead of metal can generally can be had quite cheaply. Lastly, and not to be overlooked, the archaic yet still fully functional Kodak box cameras often sell in antique shops for around $10. The only piece of advice I'd offer when looking for vintage medium format cameras, assuming you want to shoot with them, is to make sure they shoot 120 film and not 620. It is possible to respool 620 onto the fatter 120 spools but its not the easiest process.


Another interesting little camera that is made by the same company is the Superheadz Golden Half which is quite unique itself. This is a throwback to yet another popular genre from yesteryear, a 35mm camera that only uses half a frame per photo netting you twice the pictures! A few years back I was trying to find something similar on Ebay and the vintage versions were fetching prices that were outside of my range. At just over $50 these are still a tad on the pricey side all considering however they are unique and since they're new you don't have to worry about buying one and finding the lens is covered in fungus ;)
(Image from http://kualalumpurcity.olx.com.my)


I ended up ordering an orange Blackbird Fly and a "black mountain" Golden Half, once I get them and put a roll through each I'll make another post reviewing my findings. At one point I'll dig all of my vintage cameras out, take their portraits, and write up a post about all of them too but that'll be down the road.
Align Center

Monday, July 26, 2010

Insuring your gear - Have you even considered it?

If the unthinkable should happen are you covered?

This is a topic that isn't addressed very often but is quite important. How much gear do you own? Could you afford to replace any or all of it if it got damaged/lost/stolen/vandalized? Most likely the answer is no, at least not at the drop of a hat anyway.

You have to insure your car if you want to drive and if you want a mortgage you have to have house insurance, plus both of those are big ticket items. Your camera gear, if it's valuable, should be treated the same way especially if you're using it to make money.

First things first I just need to say that I'm basing the information in this article off of my own experiences, costs and policies may differ depending on which company you deal with and where you live.

After I picked up my 5DMKII I realized I really needed to look into insurance, I was starting to carry around over $8000+ worth of gear to a photoshoot and it was making me nervous. A quick call to my insurance provider and I had all the info I needed. Since I only do photography on the side and use the money mainly for funding my addiction hobby I qualified for a "semi-professional" rate provided I didn't earn more than $5000 per year. The insurance company referred to this as "scheduling items". All I had to do was draw up a list of equipment I wanted to insure, note the replacement value and serial numbers, then submit it to the broker. My rate was $3.50 per $100 worth of gear I was insuring per year. So to insure $10,000 worth of equipment costs $350 per year or roughly $30/month. If you are making money doing photography then you should already be claiming that income as a small business on your taxes and this insurance is considered a business expense which can be written off. Also worth noting is that if you schedule items they are not subject to a deductible, you simply make the claim and get reimbursed.

To my knowledge just about everything is covered, say if I'm up in the mountains taking photos and I lose my footing and drop my camera over a cliff I'm safe. There are probably some limits to this but when I ran down the list of most likely scenarios they were all covered.

So what happens if you fall outside of the semi-professional range?

If you're an amateur photographer who doesn't make any money off of photography should you still insure it? That's up to you, if you have regular house insurance it should cover items like this however you will have to pay a deductible which may exceed the cost of replacing or fixing the piece of gear. $3.50/$100 is pretty cheap, $5 a month will cover $1700 worth of gear. If you think about it you may want to say no to that extended in-store warranty next time and just buy insurance instead.

If you're a pro and are making over $5000 a year I would hope that you don't even need to read this post because you already have your gear insured but if not I'll cover it anyway. I talked to my broker today before writing this article just to make sure I had the correct info, unfortunately professional rates aren't a straightforward number, they have to be calculated based on a number of things so I couldn't get an exact rate. The gentleman I talked to though said it was most likely still close to the $4/$100 range with the exception that you are also required to get liability insurance which is a minimum of $400/yr. If you're making a living doing photography though this is just a cost of doing business and having that extra liability insurance isn't a bad thing if all of a sudden a lightstand falls on a model ;)

What if you rent and don't have house insurance?
Get renters insurance. Period. Its that simple. I've known a few people who have lost everything in fires that weren't even started in their apartment (it was a duplex) but since they had no insurance they were left with nothing. From what I've heard renter's insurance is quite a bit cheaper than house insurance since you're only insuring your belongings and not the structure you live in (your landlord should have insurance for that).

That pretty much sums up all the info I have to give on this subject, hopefully it sheds some light on a topic that I haven't seen covered much.

Sunday, July 25, 2010

Travel Photography - Destination Halifax NS

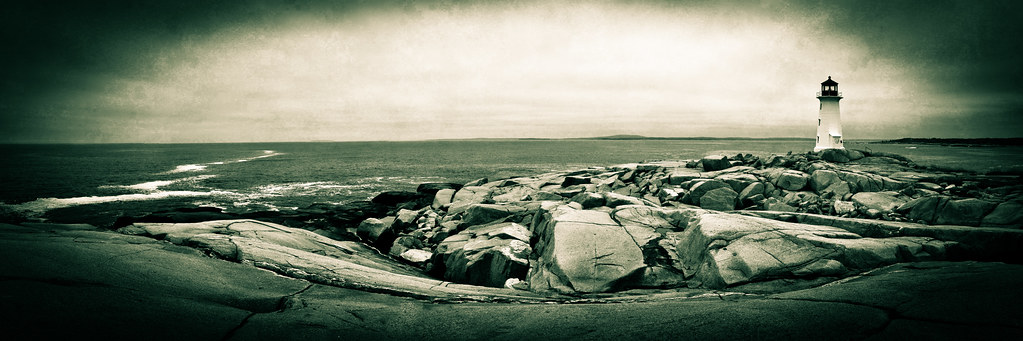
Peggy's Cove Pano I No Tourists Crop Flickr
Peggy's Cove just outside Halifax NS, Canada

Seagull and lighthouse moody blue.jpg
The narcissistic seagull of Peggy's Cove

**Note all photos from this trip can be seen here in my flickr gallery and they are geotagged if you want to know the photo's location***

As I write this my summer holidays come to an end and I'm back to work soon but I had a refreshing break and got to see some more of the beauty that our country has to offer.

My original summer holiday plan was supposed to take me to Serbia where a friend's father still has a house. We were going to check out the Adriatic coast and use their house in Serbia as somewhat of a basecamp. Unfortunately plans fell through this year but where one door closes another opens, a friend moved out to Halifax last year for school and was gracious enough to let me come out and stay with her for a week. I'd always wanted to see the east coast, I often see those tourism commercials and am always surprised by the how much Canada has to offer.

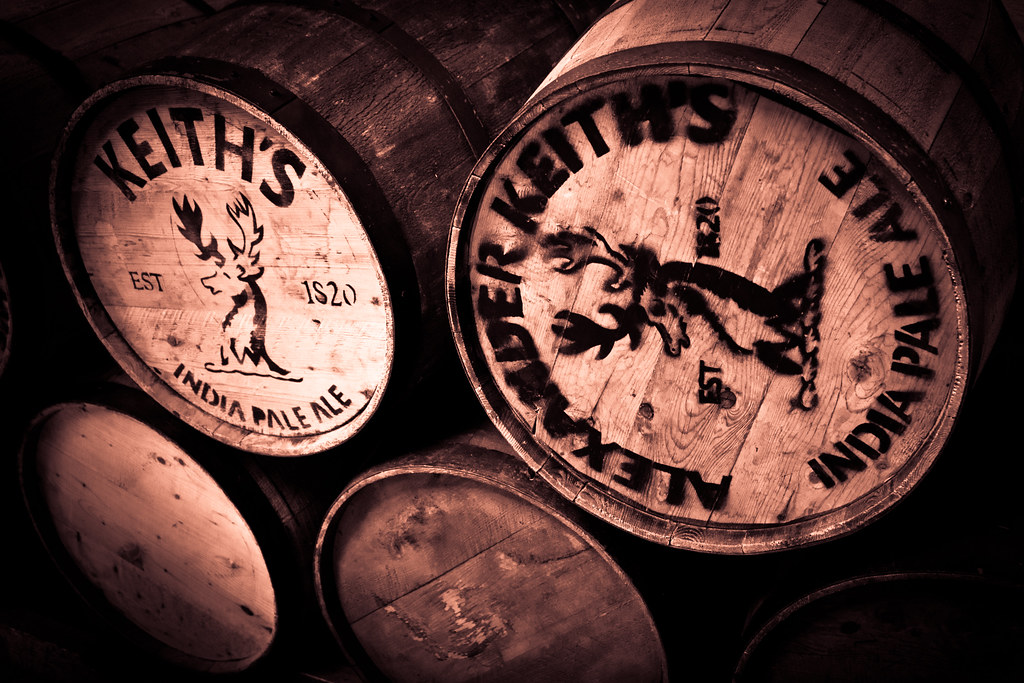
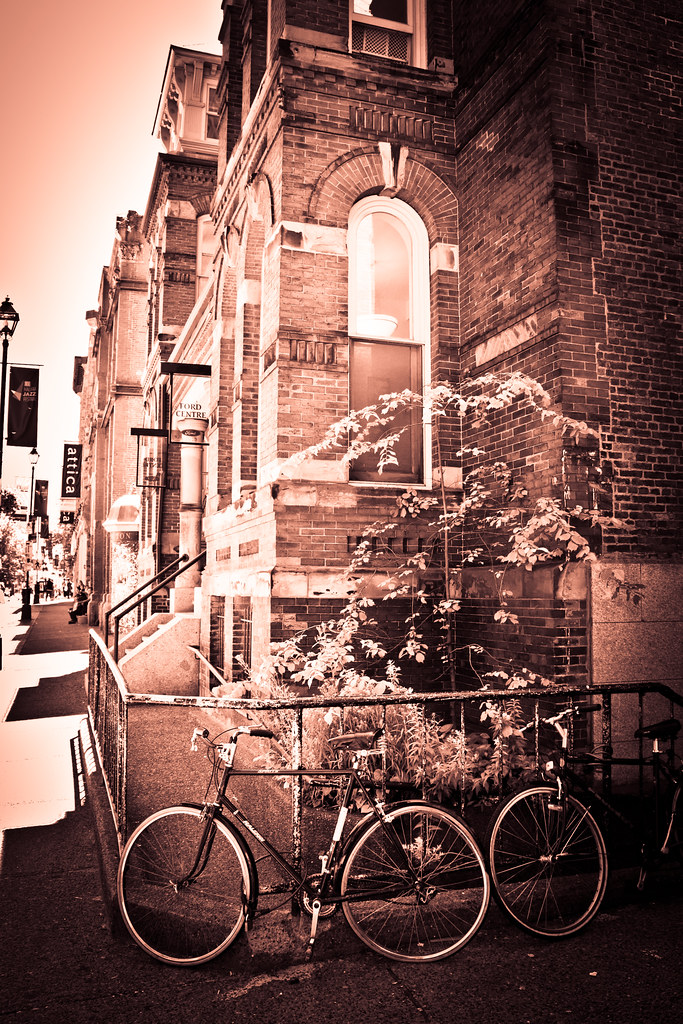
From the photographer friendly Peggy's Cove (shown at the top) to the period correct Alexander Keith's Brewery on the waterfront Halifax proved to be a fantastic place to visit.

IMG_1512.jpg
(Alexander Keith's Brewery)

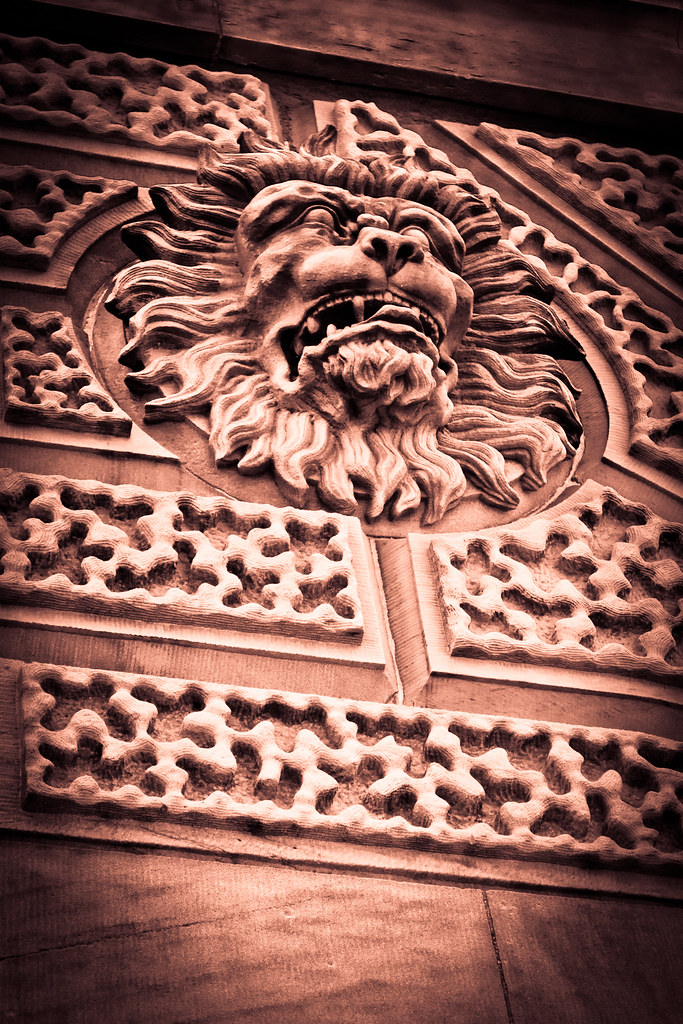
I've done a modest amount of travelling so far in my time and often I think "nice place to visit but I wouldn't want to live here", Halifax did not receive the same internal reflection. Quite the opposite rather, I could definitely handle living in this amazing little city (not sure how the winters are though lol). The buildings in downtown Halifax are just awesome, they are all older style buildings with extravagant little embellishments as you can see below.


IMG_0383.jpg
Facade on a building located across the street from St Mary's basilica

IMG_0191.jpg
A random street shot just to show a typical downtown view

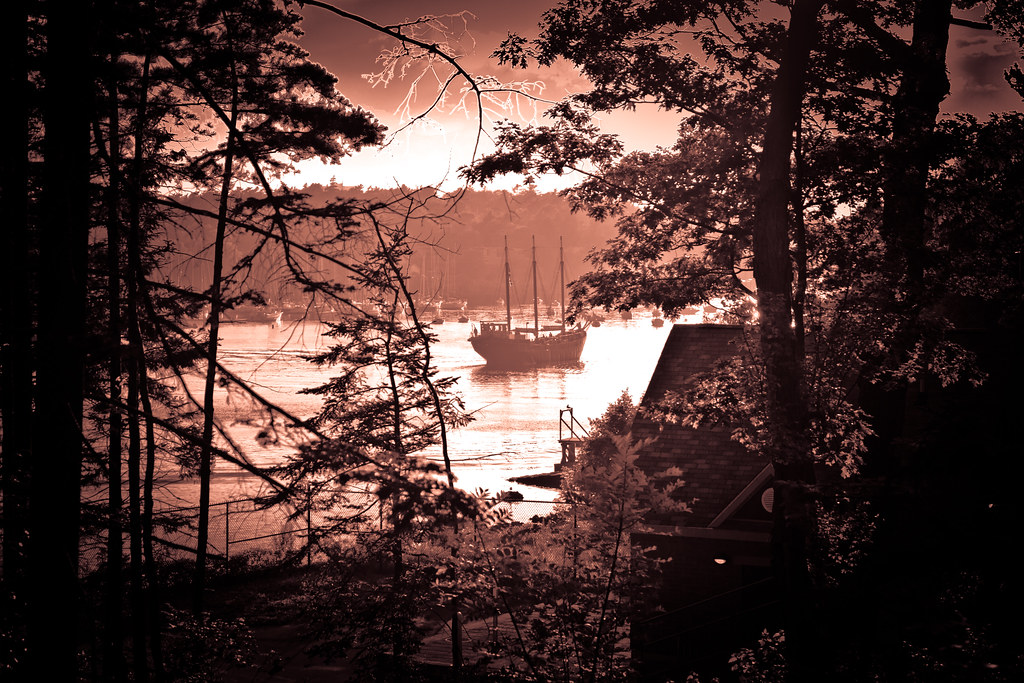
I definitely left of piece of myself behind in that port city, so many amazing places to visit that are within walking distance of the downtown. For example Point Pleasant park on the southern tip of Halifax is this dense forrested area that had me wondering if I was in northern Saskatchewan until the view opened up to reveal the water.

IMG_0966.jpg
A glimpse of the harbour is revealed while walking to the shore at Point Pleasant.

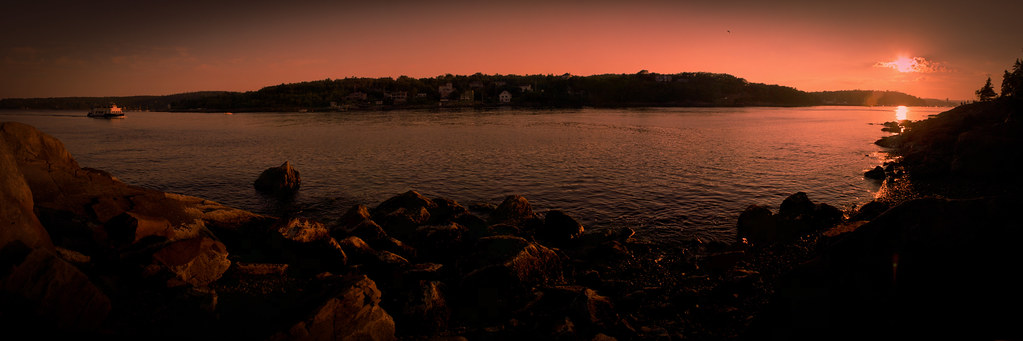
Point Pleasant Pano II edit Flickr
This is my friend's "Secret Spot" at Point Pleasant that she was nice enough to share with me ;)

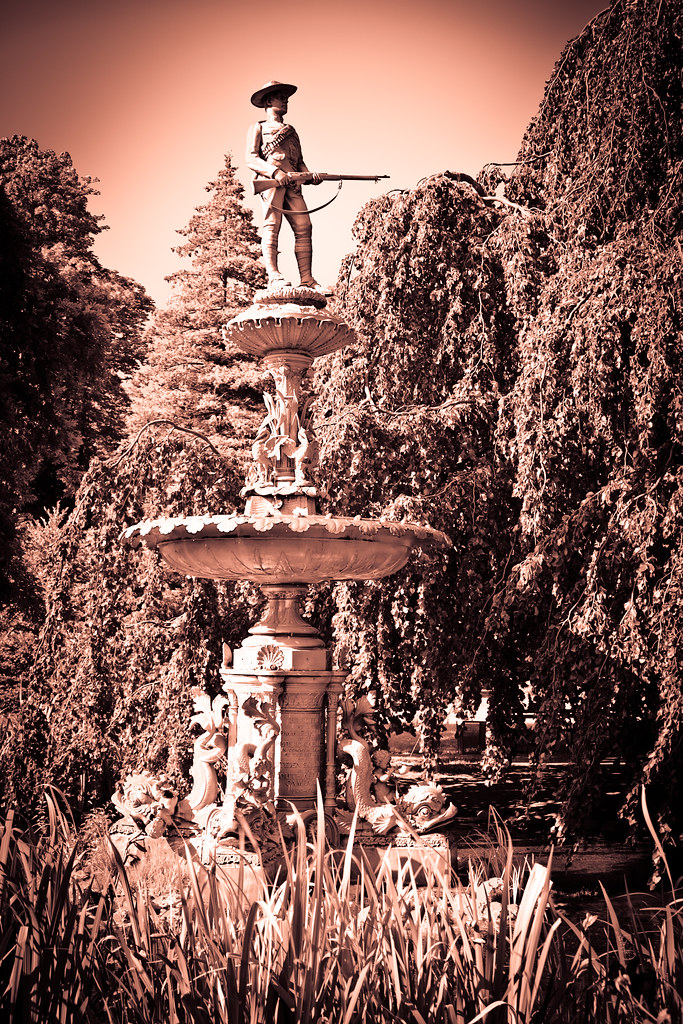
If you find Point Pleasant to be a little too rugged for your liking the Halifax Public Gardens may prove to be your cup of tea. Located between Spring Garden Road and Sackville St this huge Victorian style gardens is a very sculpted and well groomed botanical oasis just on the edge of the downtown district. Lots of sculptures and a variety of floral gardens greet you as you stroll along the walking paths.

IMG_1366.jpg
Not sure who this is represented in this sculpture but it looked quite nice ;)

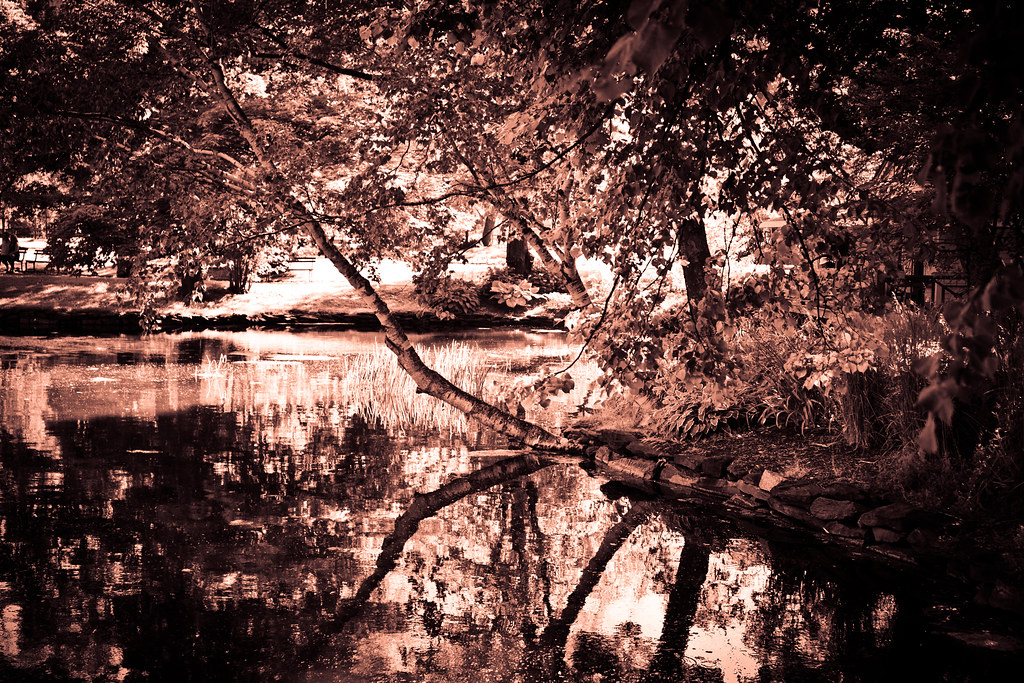
IMG_1368.jpg
The reflections in the pond drew the attention of my camera quite quickly

IMG_1406.jpg
Plenty of flora around for botany lovers

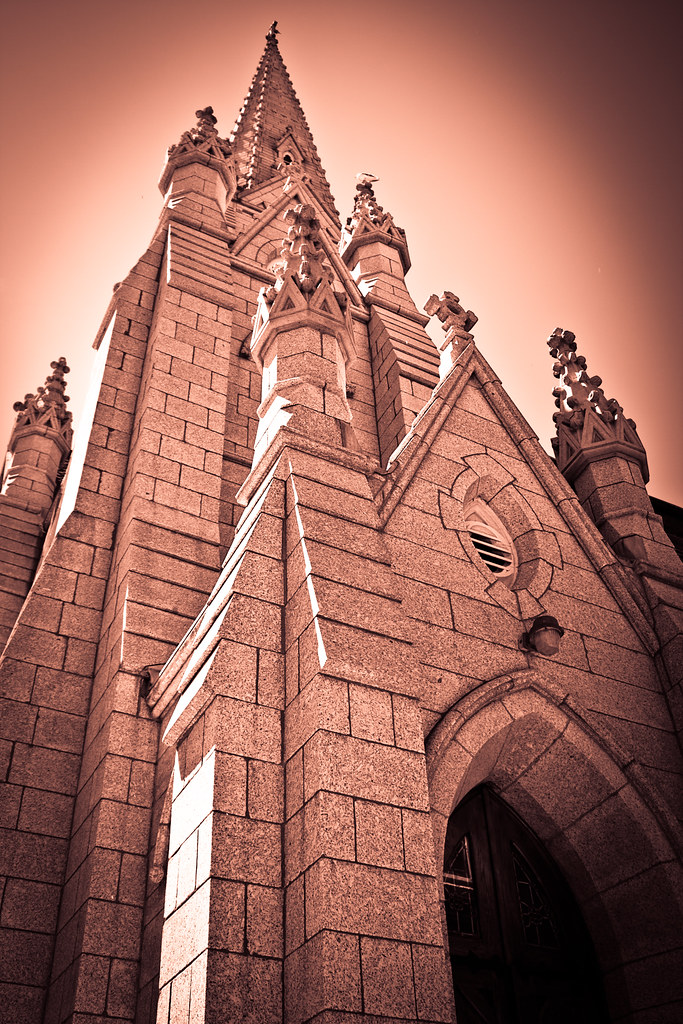
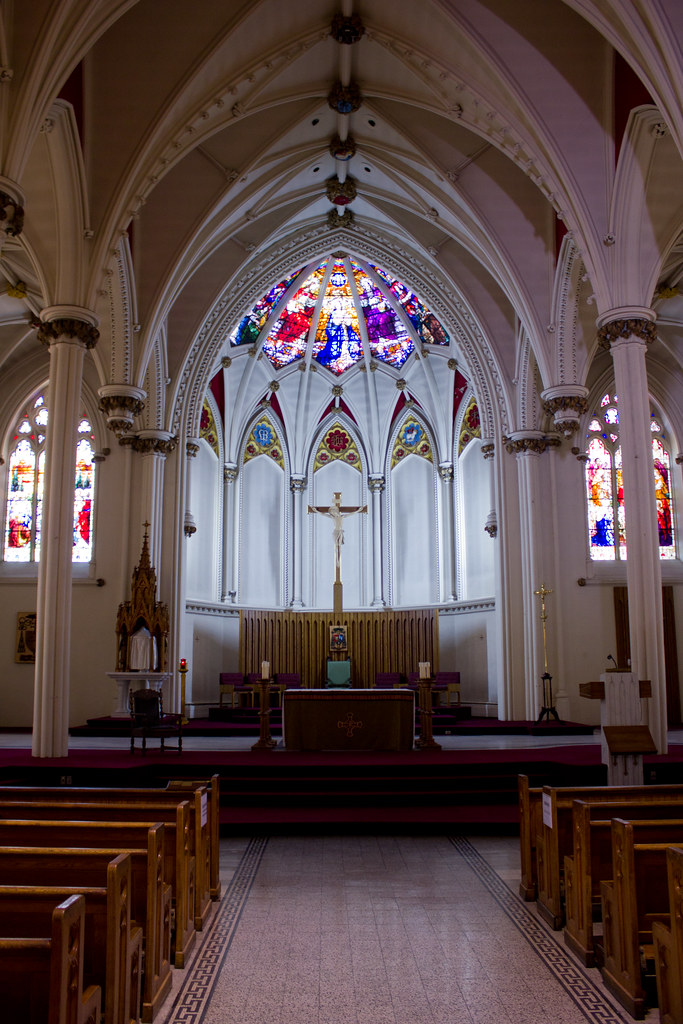
Among other places to see while visiting Halifax is St. Mary's basillica with its medieval looking architecture and exquisite stained glass windows and towering vaulted ceilings.

IMG_1568.jpg
St. Mary's Basilica marvels passers by on Spring Garden Road


IMG_0204
Amazing stained glass and huge arched ceiling definitely gives this place a surreal feeling.


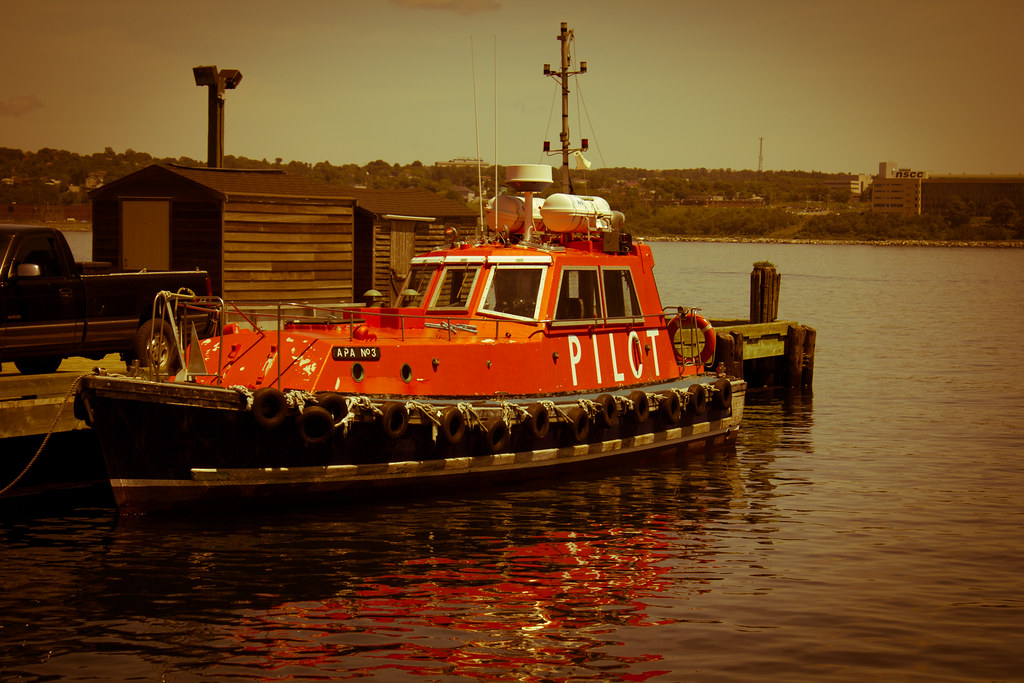
The harbour, as would be expected, is quite a busy place and is loaded with shops and tourists. Land and boat tours are constantly departing and returning, museums, pubs, restaurants, and gifts shops litter the waterfront.

IMG_0160.jpg

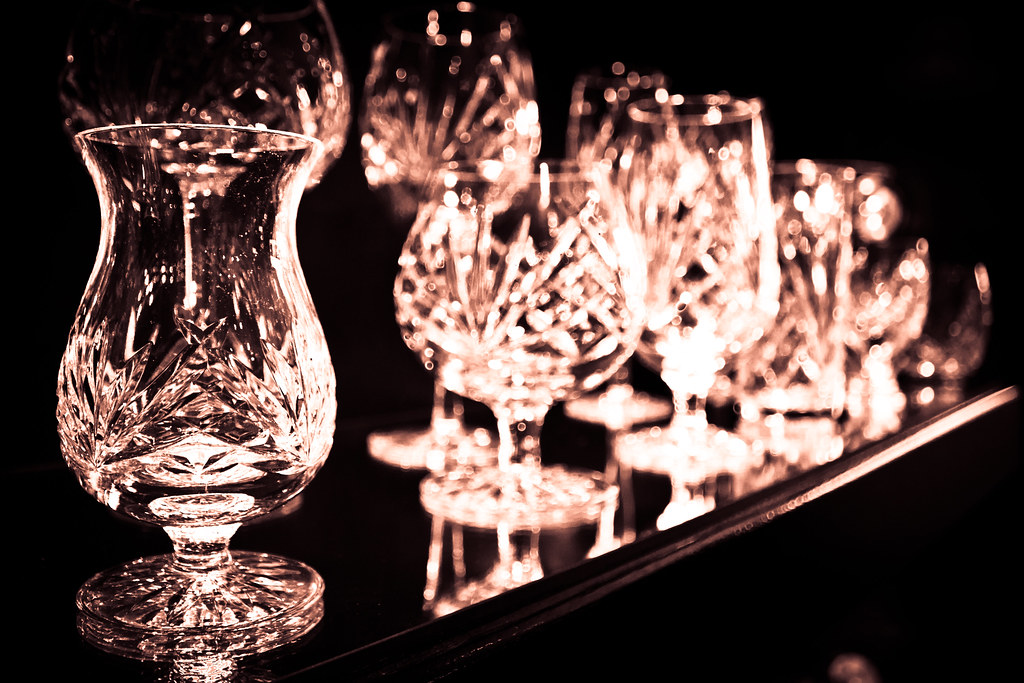
One place you should stop and see is Nova Scotian Crystal where you can watch the workers as they bend, shape, and blow the glass into stunning works of functional art.

IMG_1543.jpg
A worker puts the finishing touches on a crystal glass.

IMG_1547.jpg
Adjacent to the workshop is the storefront and gallery, nice pieces but unfortunately out of my budget

In the end there were a few places that I didn't have time to visit but the places that I did see were great. I met some really nice people, ate some fantastic food, and got to spend some time catching up with a good friend what more could you ask for ;)

Update: Photos from my Halifax trip are now available for purchase in book form!

Tuesday, July 6, 2010

Grad Portraits - On Location Shoot

Another instalment in the "why do I do this to myself series" ;) The first was the hair salon shoot where I shot 20+ models in a very short space of time. This round it was 16 grad portrait sessions at 20 min each. Ironically I scored this job because one of the hair salon shoot models referred me ;)

All joking aside it was a fun shoot, the photos turned out well and by pushing myself I learnt a thing or two.

My main concern when I accepted the job was what happens if it rains? We were shooting at an acreage an hour from where I live. I drive a Mini Cooper, not exactly the most roomy vehicle ;) I arranged to have an SUV available so I could bring out my 9ft backdrop roll. The plan was to get there an hour early and setup an indoor studio in the large garage attached to the house, this way if it did suddenly rain we could just pop in and switch to studio shots.

As the shoot approached the forecast turned from sunny to thunderstorms and rain, the night before the shoot we had the worst storm in 3 decades according to the news. Also the night before the shoot there was some issues and I was not able to use the SUV. After tossing and turning for a few hours I devised a plan to use my 5ft wide backdrop role for single shots of the grads and then use my new foldout 5x7 backdrop, something I had just received in the mail a few days prior.

Here is the setup I envisioned and in the end it was exactly how I shot.

The backdrop roll was just wide enough for some 3/4 length shots as well as some with two subjects standing close. The main light was a White Lightning Ultra 1200 fired into a 40" Steve Kaeser softbox umbrella with a second Ultra 1200 gridded and pointing at the backdrop. Every once in awhile I'd turn the gridded strobe around to rimlight the subject from the back.


After the individual and two-person shots I'd move the grad over to the horizontally placed collapsible backdrop, then I'd bring in the parents on either side for some close up portraits. The collapsible backdrop was 7ft wide (in this position) but its got rounded corners so I still struggled to shoot a group of 3 at times.

It didn't end up raining at all that day though it was quite windy earlier on in the morning, since the studio portraits were already working well I decided to shoot half outdoors and half indoors for everyone.

The outdoor photos were quite a bit easier though I did have some issues earlier on with direct sunlight. When I had scouted the location it had been overcast so I couldn't quite tell where the sun would be. All of the key locations around the yard were situated so that afternoon sunlight worked best, for the earlier shots I had to use a few alternate locations or when possible just turn the subjects so they were backlit by the sun. Fill flash was pretty much mandatory so I put my 580EXII to work.


One thing that surprised me quite a bit was the longevity of the LP-E6 battery the 5D MK II uses. I already had a 2nd battery as a backup but since Canon spec'd the LP-E6 at around 550 shots I figured I should get a 3rd spare (16 grads x 100 photos each = 1600). After going out of my way to find a store that had any in stock I didn't end up needing it at all! I shot the whole day on one battery (~1600 photos!) and still had 1/4 battery left. There aren't many devices nowadays that even live up to their specified battery performance let alone triple them! Just another reason why I'm sticking with Canon. Oh and the 580EXII lasted on just one set of Sanyo Eneloop batteries too!

Summary

Would I do it again if asked? Yes but my bid would be at least 50% higher, I realized later I had undercut myself when I gave the initial quote.

What did I do wrong? All in all not much, see "what would I do differently"

What did I do right? Brought backup gear (though it was not needed) for just about every piece of equipment. Bringing tons of bottled water to keep hydrated, when you're talking all day long directing people for 8 hrs you need lots of water. Making a trip out to the location ahead of time so I knew exactly what I was up against. Shot in RAW, due to the lighting outdoors changing minute to minute the extra exposure latitude that RAW gave me helped immensely. Gear checklists so I didn't forget anything (except a posing stool).

What would I do differently? Secure a rock-solid method of transport for my 9ft backdrop paper. I also would have brought a posing stool, I had thought of it the night before but didn't write it down on my checklist (luckily the acreage had one for me).

What did I learn? Planning for the worst case scenario is always the way to go, weather can change and helpers might bail, always have a backup plan.

Gear used:
Canon 5DMKII, 24-105mm EFIS L lens, 580EXII, White Lightning Ultra 1200 x 2, Cameron portable backdrop stand, 5ft roll of studio grey paper, 5x7 Impact Collapsible Backdrop, Yong Nuo PT04-TM wireless triggers, ASUS 1005HA netbook for dumping files.

Backup gear I took but was unneeded: Canon T2i w 18-55mm IS kit lens, Canon G10, Interfit 42" dual reflector, Cameron 400W studio strobes x 2, 3 YN460 MKII speedlights, 2 Nikon SB-26 speedlights, 6 sets of Sanyo eneloop AA batteries.

Sunday, May 16, 2010

Car Photoshoot Round 1

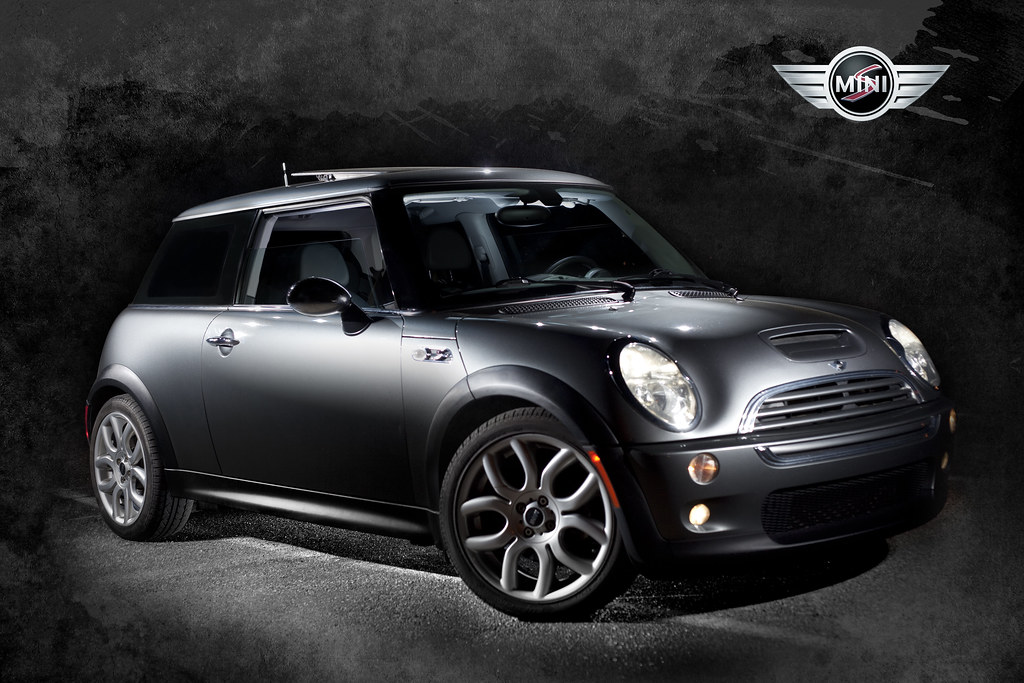
My '03 Mini Cooper S
The final image comprised of 8 composite shots.

Just a quick post about my first real attempt at lighting a car using off camera flash and a list of do's and don'ts from the experience.

I did this shoot with a fellow photographer friend of mine, we took turns between pressing the shutter and being human tripods holding the flashes. All in all I was quite happy with the final product. I would have liked to had a few more variations from different angles but since it was our first time we just tried to keep it simple.

My initial idea was to head out after sunset so that we didn't have much ambient to worry about, the intent was a finished image much like the one above with the car surrounded by darkness. My buddy Perry wanted to go around sunset so we could try shooting both ways and since we had plenty of time that is what we did.

Here's a shot that Perry took while it was still quite light out so no flashes were used. It shows a little more of the location we were using, we did the shoot behind one of my company's buildings since it backs a field and we know the place is quite dead on the weekends.
Image courtesy of Perry VanDongen


Gear:
Canon 5DMKII
Tripod
50mm f1.8 Prime Lens
Yong Nuo PT-104TM wireless transmitter and two receivers
Two Yong Nuo YN460MKII flashes

Do
... lock down your tripod to avoid any movement.
... keep the camera in one spot then light each aspect of the car shot by shot.
... bring fresh batteries ;)
... pick a place that is out of the way.
... use a softbox if possible to avoid bright reflections
... bring a wireless shutter release if you have one
... take the time to light the ground all the way around the car
... take lots of photos in each "pose" it only gives you more options in post
... bring a few rags to wipe down the car

Don't
... pick a spot with a lot of lights around, they'll get reflected on the car.
... shoot a dirty car, the flash lights up dust quite well ;)
... leave your aperture too wide open making the DOF less than the car's length
... forget that leaving your lights on with the car off will kill your battery
... bother trying to shoot before dusk if you want to use speedlights
... light the car at angles that will yield harsh reflections (when possible)


In the end the shots where we tried to mix ambient and strobes didn't work out too well and thinking back on it I now why. What we should have done is taken a few shots that just exposed ambient then shot faster shutter speeds to light the car with the strobes. Instead we were trying to do both at once and simply didn't have enough watt-seconds in my dinky speedlights to pull it off. Some of the "don'ts" listed were learnt the hard way, for example I accidentally left the aperture at 2.2 so the front of the car is a little soft. Also despite having detailed my car that afternoon by the time we got to the location it covered in a thin layer of dust.

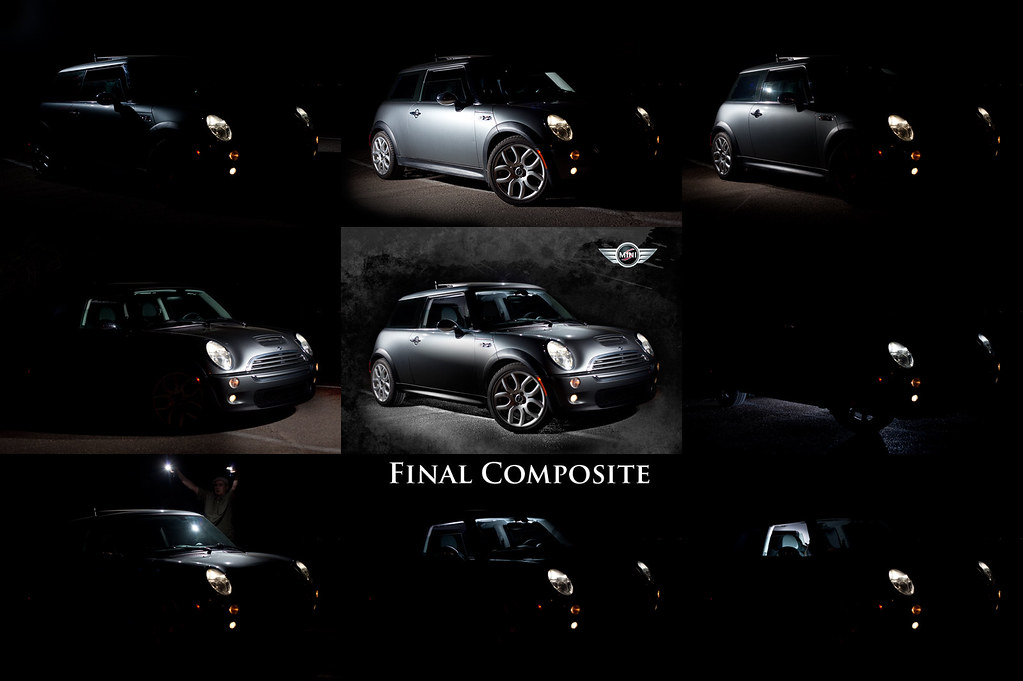
The final image at the top of the post was comprised of 8 different car shots (plus a few texture/logo layers). Using the "lighten" blend mode in PS I stacked each photo and masked out the areas I didn't want to show up. This gives you amazing control and allows you to create a finished image that would most likely have been impossible to light in a single exposure.

Composites for Mini shot

For the interior shots I actually had the seat laid all the way back and sat inside moving the speedlights around while my friend snapped away. A nice surprise about the interior shots was that they hid all of the smears/fingerprints on the windows.

All in all I think we accomplished what I had in mind when we set out to do the shoot. Next time out I'll definitely do a few things differently but we did pretty good for a first attempt. In the end this was a great learning experience and since it was my own car there was no pressure, we could just play around and have fun.

Tuesday, April 27, 2010

Ok I bought a dSLR now what?

OK

I bought a digital SLR camera. . .

now what?

A few people have approached me lately with essentially the same question, some were asking about what kind of lenses they should buy others about what kind of software they should use. Thinking that these were probably fairly common questions I decided to write up a little guide outlining a few things you should consider. They are arranged roughly in the order you should consider them too ;)


What attachments/accessories/lenses should I buy?

This all depends on what you plan to do and your budget but here are a few suggestions:

UV Filter

Chances are good that if you bought your camera at any respectable shop they would have tried to sell you one of these right away. No it's not a con by the sales associates (mostly) the idea is that it if something is going to get scratched it'll be a $30 filter instead of a costly lens. If you're just starting out in photography you probably won't need a top of the line brand filter so don't let the sales person get carried away trying to upsell you there.

*Tip: One interesting quirk to watch out for is what you see in the image above. It happens if you're using filters when taking long exposures at night of northern lights. I won't get into the physics of it but it has to do with a certain wavelength of light and the two parallel faces of your lens and the filter.

Lenspen

I think that all photographers should have one of these in their bag. At around $10 you'd be crazy not to have one anyway. One one end is a retractable brush that is good for knocking loose dust and debris and on the other side protected by a cap is a slightly concave felt pad for getting more stubborn materials off your glass. Over time (and depending on usage) they should probably be replaced so you have a new felt tip, that being said I've had mine for years and see no need to change it yet.

  • Tip: They also make lenspens for point and shoot cameras, they have a smaller triangular felt pad for cleaning the smaller lenses.

Carrying bag/Camera Backpack

You just dropped a lot of money on your new camera so you should spend a little cash in order to protect it. There is a plethora of options in this department, unfortunately once you're getting into dSLR size bags the price goes up because there is less demand for them.

Above are some choices from LowePro, a company that's been around for decades and is well respected among photographers. There are a variety of choices ranging from simple hip pouches to sling bags and full backpacks which even accommodate laptops.


*Tip: One word of advice is buy a slightly bigger one than you need so that if you pick up a few lenses later on you can still carry them.


Tripod/Monopod

Investing in a decent tripod would probably be next on the list for most people.

Why do I need a tripod? There are a number of reasons but mostly it allows you the luxury of shooting at slower shutter speeds without producing blurry pictures. If you read my guide on understanding lighting you'll already know that you always want to keep your ISO as low as possible (sensitivity to light) in order to get the sharpest photos, however if your available light is already quite low the only options are to increase your aperture and/or lower your shutter speed.


If you're wanting to do any of the following photography you'll need a tripod:
Landscapes, wildlife, macro, sports, lowlight/night photography (lightning, northern lights) and anytime you're using a telephoto zoom lens

The rule of thumb is that 1/60th of a second is the slowest shutter speed you can safely shoot handheld (though this is changing as image stabilization technology improves) but with a tripod you can have exposures lasting as long as minutes or even hours. As I mentioned above any time you're using a zoom lens you should be using a tripod, the reason is when you're zoomed in that far any small movement gets multiplied by your magnification X.

Good brands for tripods are Manfrotto, Slik, Gitzo, Velbon to name a few. Avoid tripod's designed for video cameras, they tend to be sloppier. When you're looking for a tripod you want one that is sturdy and won't allow your camera to move when all the adjustments are tightened up.

Tip: A monopod may be what you're after as well, they are good for sports photography because they don't take up much space . Keep in mind though that you can always use your tripod as a monopod simply by not splaying the legs out. I'd recommend starting with a good tripod and if you think you need a monopod later then go for it.

Extra lenses:

In short the best two lenses you can add to your kit are a zoom that compliments your kit lens and a nice fixed prime lens.

Zoom lenses:

Most dSLR's come with a general purpose standard lens, typically around 18-55mm. For most situations this is the best lens to use however sometimes you need a little extra zoom and that is where the telephoto lenses come into play. A good companion to say an 18-55mm kit lens would be something like a 70-200mm or a 70-300mm, this way you're not missing much range between the upper end of your 18-55mm and the lower end of your telephoto. If you find a good deal on a lens that will leave you with a gap don't rule it out though, it just means you'll have to keep this in mind when shooting and you may have to move back a little to get the same composition in your shot.

Depending on your camera manufacturer you might be able to find older lens used for a fraction of the cost of a new lens. For example Canon's EF lenses will work on their dSLRs but due to the fact most dSLR's have a smaller sensor the magnification factor will be larger and I'll explain this below in a bit. When in doubt call your local camera shop (Don's or Phase II for example) before purchasing a used lens to make sure it will work with your camera and if possible try it out on your camera first to make sure it fits and the auto-focus is compatible.

A note on cropped sensors:

If you have a dSLR camera and paid less than $3000 for it chances are good that your camera's sensor is what's referred to as a “cropped sensor” or “crop sensor”. This goes back to the days of 35mm film cameras, the film was the part that “sensed” the light and was 35mm diagonally across. The sensors in consumer grade dSLR's are smaller than that of the 35mm frame hence the term “cropped sensor”. What this means is that if you find an older used lens that was made for a film camera the zoom rating will not be accurate anymore. For example if you put a Canon 100-300mm EF lens on a Canon Digital Rebel dSLR which uses a 1.6x crop sensor your effective zoom will actually be 160mm-480mm.

1.3x – Canon EOS 1D/1D MkII
1.5x – Nikon D40/D50/D70/D70s/D80/D200/D2XD2Hs Minolta 7D/Fuji S3 Pro Pentax *istDS/K100D/K110D/K10D
1.6x – Canon EOS 300D/400D/20D/30D

Here's a nice little reference table of standard zoom sizes and their effective zoom's on a crop sensor.

Full Frame 1.3 Crop 1.5 Crop 1.6 Crop

Don't let any of this dissuade you from saving some cash by picking up an older telephoto though as there is another advantage besides the extra zoom. All lenses suffer from some inaccuracies due to how the lenses are ground and what materials they are made from etc, this results in the center of the lens being sharper than the outer edges of it. When you put one of these older lenses on a crop sensor camera you dramatically improve the quality of the image because the sensor only uses the central portion of the lens thus discarding most of the area that is degraded.


As mentioned previously if you plan on shooting with a zoom lens you should really consider using a tripod, at higher zoom ranges any vibration or shakiness is multiplied dramatically and will result in blurry images.

One last thing to note is that when buying any lenses you typically pay a lot more if you want a larger aperture (aka a faster lens). Where a 70-300mm F5.6 lens may cost $250 the same lens capable of f2.0 may run in the thousands.

Prime Lenses

Before the days of variable zoom lenses they were all fixed zoom aka prime lenses. Why would anyone even consider a lens so limiting? Below are 3 very good reasons:

1. Image quality
Variable zoom lenses are made up of many more elements than a fixed prime lens, this means any errors in how each of these elements are ground will add up and therefore decrease the total optical quality of the lens. Due to this fixed lenses tend to be sharper across the entire image, not just the center. Other optical issues like barrel distortion, pincushion distortion, and chromatic aberration are reduced in prime lenses.

2. Speed
This term may be new to you but when someone refers to a lens as being “fast” they mean it takes in a lot of light allowing you to use a faster shutter speed. Due to how they are made they often are available with very wide apertures (1.2, 1.4, 1.8 etc) compared to the variable lenses. Why is this important? Photographers always run into the same problem: not having enough light. Say you're shooting indoors and want to avoid the use of a flash (at a wedding for example) and your camera tells you in order to get a proper exposure you need to shoot at 1/4h of a second at ISO 100 at f5.6. 1/4th of a second is going to result in a blurry shot even if you're using a tripod because the people will probably be moving a little. If you have an F1.4 prime lens available that would give you 4 more stops of light to play with letting you shoot at 1/60th of a second instead which is shoot-able handheld. In short it gives you options.

3. Shallow depth of field thanks to wider apertures

By using a very wide aperture (F1.4 or 1.8 etc) a very dreamy effect can be accomplished as backgrounds softly blur away allowing the viewer's eyes to be drawn to what matters.

So which focal length should you buy?

If you're going to pick up a prime lens I suggest going for a 50mm. The reason is that this is a very popular focal length for portraiture and therefore manufacturers make higher volumes resulting in lower prices. For both Canon and Nikon a 50mm prime can be found for under $150 and most likely other manufactures have similar prices to stay competitive.

Keep in mind though you may have to apply that multiplication factor to the focal length that we covered earlier in this article so your 50mm may end up working more like an 80mm if you're shooting a Canon. Don't get hung up on that though as generally “portrait” lenses are regarded as anything between 50-100mm.

Software Options

Here are a few options when it comes to image editing/library management. I highly recommend trying all of the free ones first as well as any trial downloads you can find before spending any cash at all.

Photoshop (CS4 is $1000, Elements Ver 8 is $129.99)

Now for image editing software Adobe Photoshop is the gold standard in the industry (CS4 is the current version), it’s the program that everyone uses. It is also ridiculously expensive which leads to a lot of pirating, there are tons of torrents available if that is the path you choose (I'm not condoning it). Another, more affordable option, is Adobe Photoshop Elements which is a "lite" version that sells for $129.99 as I write this at London Drugs. Check Adobe's website for downloadable trial versions before dropping any cash.

  • Pros: It is the industry standard bar none.

  • Cons: Pricey, A bit of a steep learning curve, I've used it for 8 years and am still learning new things every day.

GIMP (GNU Image Manipulation Program) FREE!

GIMP has been around for years now and has come a long way, it is by far one of the most full featured photography programs second only to Photoshop and maybe a few others. The best part is that since it started out in Linux the software is FREE. I recommend downloading simply because it is free and trying it out, chances are it will do everything you need it to do. Realistically the stuff that Photoshop has that GIMP lacks is more for advanced users anyway. There are parts of GIMP that aren't very user friendly or just outright backwards if you're used to Photoshop but the price kinda makes up for that ;)

  • Pros: Its FREE, full featured, and has an abundance of free tutorials and books online

  • Cons: Steep learning curve, not user friendly in some instances, awkward if you're used to Photoshop

Picasa a FREE program made by Google

I'm a huge fan of FREE and often recommend this program. It's no Photoshop when it comes to features but it is very user friendly and covers all the basics like cropping, resizing, exposure correction, and some nifty filters for spiffing up your photos. Picasa also acts as a photo manager for organizing your pics and has other handy features like "email" that will re-size your photo and automatically place them in a new email for you to send (supports outlook, gmail, and a few others). Personally I don't like the photomanager portion of it but that's just me.

  • Pros: It's FREE, covers most if not all of the “basics”, allows for fun projects like collages and slideshows

  • Cons: Due to its easy to use nature more serious photographers may not like the lack of complete control.

Adobe Lightroom ($369.95)

It takes its name from the film days where photographer's would view their negatives on a light table etc. Essentially it is a workflow tool for organizing your photos and is also a feature rich "digital darkroom". It gives you a plethora of controls for developing your photos and most "pros" use this to import & tweak their images before editing them in Photoshop. This isn't really a tool for beginners but if you're shooting in RAW already you might want to look into it.

  • Pros: Its fast becoming the industry standard for workflow and photo management, offers finer development control and Photoshop, great for processing RAW files

  • Cons: Price, Semi-steep learning curve, really meant for serious photographers