Sunday, November 15, 2009

Go Go Gadgets On The Go


I've got a few pieces of gear to share with you that I'm starting to find invaluable, they are all small and easily portable and meant for use on the go.

The main item I wanted to discuss is my new eeePC netbook, its been a few weeks now and I'm convinced that nobody should be without one least of all photographers packing light.

eeePC

When I first heard about the miniaturized laptop movement (OLPC, uMPC, eeePC etc) a lot of people were saying they were severely underpowered and for the price you could get a decent laptop for $100 more. Because of this I kept my distance but decided I'd check in on the technology once in awhile. A few weeks ago I finally took the plunge, my b-day was around the corner and I figured I'd treat myself with a netbook.

I settled on the ASUS eeePC 1005HA model, it seemed to have enough oomph to do basic tasks and have a long enough battery life to get me through any typical shooting jobs. After having it for awhile now I find I underestimated both the power and the battery life (although admittedly I did upgrade to 2GB of RAM). I've had laptops before and they did their jobs however I often hated lugging around all the power adapters etc. Battery life on most laptops was about 2-3hrs but I never trusted that and found myself never bringing it anywhere that I couldn't plug it in anyway. The netbook however gives me 6hrs + of constant heavy use and 8-10hrs of light use and standby, I've yet to even have a low battery warning pop up.

Far from being underpowered I find myself running all sorts of programs on this machine, even crunching through 200MB+ psd files in Photoshop. I just finished a series of art prints that I made almost entirely on the netbook, from vectorizing them in Inkscape to layering/blending/compositing them in PS.

I'm always working on a project of some sort and this netbook lets me take my work wherever I want to go, from whipping up a 3D model in Sketchup to making a quick poster for a friend's charity event in Gimp I have the tools to do it wherever I take my netbook.

For even more versatility I installed Ubuntu 9.04 through Wubi which is an installer that lets you install Linux as if it were a regular program in Windows (good for newbs like me). Provided you have a wired internet connection to start with getting the rest of the eeePC specific drivers and bells & whistles installed was easy, I followed most of this guy's post on how to do it. His article is for installing it as the main OS instead of dual boot which the install through Wubi creates. Also he is using the netbook remix edition of Ubuntu. He lists all of the packages you need to install though to get the wifi working and all the function keys etc, just type them into Synaptic and you'll be good to go.

Here is what makes it great for photographers:

  • Portable Storage - Use it on location to dump memory cards, even if you have enough cards to handle your shoot it still provides a level of redundancy in case a card fails or you accidentally delete the contents.
  • Impromptu Slideshow - Showing your client/model/customer the shots you've just taken on the back of your camera is often cumbersome and doesn't give them a good view, use the netbook instead to give them a better show.
  • Image Editing - While it isn't quite a desktop replacement you can still do quite a bit of editing on this machine. Sometimes doing a quick edit to show the client your concept and make sure you're on the same page can save you wasted time later in post.
  • Internet Access - This assumes you have an available wifi access point, you can upload shots to say Flickr or Picasa etc shortly after you take them or post them on your blog.

iTouch/iPhone
The next piece of gear I wanted to share was a device that almost nobody has heard about ;) Ok fine so they're ridiculously popular, so popular in fact I actually avoided upgrading my 60GB ipod photo purely because I didn't want to jump on the bandwagon. I was foolish to fight progress, the iTouch I picked up is a very versatile piece of gear. Its like a mini computer really, the web browsers I've used on small devices previously (pda's, Sony PSP, etc) were frustrating to use and very slow. The iTouch/iPhone browser experience is lightyears ahead of those and its fairly speedy too, all that remains is for apple to pull their heads out of their a$$es and allow flash to work on them.

Here's what makes it great for photographers.

  • Portfolio in your pocket - Whether you're just showing friends your latest photoshoot or pitching yourself to a prospective client it is handy to have your entire portfolio at your fingertips.
  • Apps galore - While most of the photography apps in the store are geared towards gimicky effects for the iPhone's camera there are some that can be used for serious photographers. Some are simple calculators for Depth Of Field (DOF), some simply tell you sunrise and sunset times by your location, others give suggestions for shooting in certain situations (neon lights, campfire, lightning, aurora etc) but some like the dSLR remote lets you control your camera remotely and even see through the viewfinder (only on certain models).
  • Portable inspiration - When browsing the interwebs keep a folder of photos you find inspiring or of shots you'd like to try, then dump them periodically to your ipod. This is also handy for keeping an album of poses if you're shooting people, often times I'll draw a blank mid-shoot on how to pose the subject only to realize afterwards that I should have tried "this angle" or "done that instead".
  • Maps* - Running late and can't find the location you're supposed to be shooting at? There's an app for that ;) Google maps can be very handy in this instance, this summer while on a roadtrip to BC our car overheated and thanks to the ipod we found a VW dealer only 1.5 kM from where we were. *This assumes you have wifi (or a data plan on the iPhone).
  • Scout Locations (Using iPhone Camera) - See an interesting alleyway or perhaps an alluring spiral staircase that you want to come back to for a shoot? Take a snap of it. Some software even lets you geotag the location so you can even get directions back to where you took the photo.

Digimate III portable HDD and card dumper
This device made the list because of its potential, I truly haven't reached the point of not being able to live without it. Long story short the one I received had some bent pins in the CF card slot so I'm in the process of getting a replacement. Hopefully that doesn't scare you off though, this is the first incident I've had like this in many many orders from this company so they're track record is still good!!!

Essentially this device is an enclosure for a 2.5" laptop hard drive, however unlike most of its kind this one had built in card readers and a chip that lets you plug in a memory card and copy its contents to the hard drive. I really can't believe there aren't more products like it out there, the ones that do exist are often so overpriced they go extinct quickly due to lack of sales.

I was able to test out the one I received using other memory card slots however and found it to work very well, transfer speeds while not blazing fast were more than sufficient.

This device is really just a shell, you need to still purchase a hard drive to stick into it. The price of drives comes down daily so for as little as $50 you can buy a 250GB sata drive. On that note I should point out that there are 2 versions of this item, one for SATA drives and one for IDE drives. IDE drives are starting to reach the end of their lifecycle and are therefore become more expensive than the more abundant SATA drives. Unfortunately I didn't realize there was a SATA version when I ordered mine so I was stuck with IDE and a 160GB size limitation.

I'll try to post a followup on this device once I get my replacement. I can't see myself using it every day (except maybe as just a portable HDD) but I can see it being a great companion while travelling and for an extra layer of redunancy during photoshoots. One final thing to note however, this device requires the HDD to be formatted as FAT32 which is something that Windows has issues with. Windows will limit you to a max of 32GB partition size which can be annoying. You'll need to use a third party software program to format the drive, I used GParted in Ubuntu as a quick method but plenty of tools exist for Windows environments too.

Why it's great for photographers:

  • Large storgage - Even if you get the IDE version which is limited to 160GB thats still a ton of shots. I carry two 16GB cards when shooting RAW with my 5DMKII and don't often worry about space, this would be like having 10 cards.
  • PC Free Transfers - If you're like me you already have enough gear to lug around, being able to travel without a pc (even a netbook) will cut your weight down a lot.
  • Extra Redunancy - Even if you have tons of memory cards and don't require the extra space its still a good idea not to keep all your eggs in one basket. Dumping the cards to this device will help protect you against accidental data loss.

Tuesday, September 15, 2009

Photo Archiving Pt 1 - Learn along with me

There is a word that can make almost any photographer cringe... "archiving" or alternatively "backups". It just seems like one big Monday, lots of tedious repeditive work thats boring. Well all it takes is one harddrive crash and you'll realize just how important it all is. I've been lucky so far (knock on wood) in that I haven't had any HDDs fail but a few friends have recently experienced it and that was enough to light a fire under my butt.

This post may turn out to be a series, at least thats my current intent. As I go about backing up and archiving I'll share with you what I've learned in hopes that it saves you time. Everyone has different needs so what I do may not work for you.

First things first, what types of backups are available.

1) CD's and DVD's
2) Harddrives (HDD)
3) Online

I have over 400GB of photos and now that I'm slinging a 5DMKII each trigger press means a 30MB+ RAW file. CD's and DVD's aren't going to cut it except for maybe the finished edits from each shoot. Harddrives are getting cheaper by the minute, a 1TB drive is around $100 right now, this will definitely be one of the options I go with. Online backups, this is a viable option but it depends how much you shoot and how much you're willing to spend on storage space. Another downside is that its one of the slowest of the 3 methods since most service providers limit upload speeds.

Conclusion: A nice mix of all 3.
After I'm done editing a shoot I'll burn DVD copies of the top pics as well as upload them to my flickr pro account (full size of course). I'll use HDDs for the main backup possibly in a RAID 1 configuration or multiple external HDDs that all contain the same data incase one fails. We'll go more indepth into this later.

Staying Organized
This is the most important aspect of archiving, I'm no saint when it comes to this but I'm turning over a new leaf ;) Last week I had my photos scattered across 5 harddrives, some internal and some external, none in what any sane person could all an organized fashion. I've spent the last 3 or 4 days, a few hours at a time, copying them all to a 1TB external drive.

First I created folders on the 1TB drive to classify the photos in the root of the drive

People
Places
Personal

From there I can make more specific folders
People
>Modelling
>Family Portraits
>Weddings

Places
>Travel
>Nature
>Animals
>Urban

Personal
>Family
>Parties
>Other

These are just examples, I may change or add or remove folders and sub-folders as I see fit. The point is there is rhyme and reason to the folder layout. Keep the sub-folders fairly generalized or else you'll just end up with another maze of folders to navigate through.

Importing your photos properly
Taking a little extra time when you're dumping your memory card will save you lots of time later. If you're not already using some form of photo management software its time that you started. I highly recommend Adobe Lightroom 2 but another (and free) alternative is Google's Picasa. Both will catalogue your photos and give you options when importing. Both programs have the ability to detect when you plug in a memory card and will ask you if you want to import. Choose the appropriate folder to import to and name the folder with a descriptive title like "Crooked trees with Sarah", then be sure to add keywords that will help you search out the photo later. For example my the previously mentioned import was a modelling portfolio shoot I did out at the crooked trees so I keyworded it as follows: people, modelling, fashion, portrait, female, girl, location shoot, crooked trees, trees, 40D, autumn, fall. With these tags I should easily be able to search my catalogue and find them quickly by only entering one or two of those keywords in my search. Another option during importing is to replace the generic "Image_001.jpg" filenames with something more descriptive. Again in this case I might use "Crooked Trees Sarah" as my prefix so that my files come out Crooked Trees Sara 001.jpg, Crooked Trees Sarah 002.jpg etc.

Off-site Backups
Another thing I should note is the importance of an off-site backups. You never know when disaster could strike and either your house gets broken into or you have a house fire or flood etc. This is where backup option #3 the online backup is handy but most of the time you don't have all of your photos online. When you're burning off a DVD take another 10 minutes and burn a second one off to store at your parents place or in a safety deposit box at the bank. The same can be done with a second external HDD, the only issue with this is having to go pick it up periodically and update the new files on it. It all comes down to that cliche of "don't put all your eggs in one basket".

A quick note on HDDs and RAID
I'm ashamed to admit, being a tech and all, that I didn't really keep up to date with what exactly RAID is. RAID stands for Redundant Array of Inexpensive Discs

There are various RAID configurations, here is an excerpt from Wikipedia
  • RAID 0 (striped disks) distributes data across several disks in a way that gives improved speed at any given instant. If one disk fails, however, all of the data on the array will be lost, as there is neither parity nor mirroring.
  • RAID 1 mirrors the contents of the disks, making a form of 1:1 ratio realtime backup. The contents of each disk in the array are identical to that of every other disk in the array.
  • RAID 5 (striped disks with parity) combines three or more disks in a way that protects data against loss of any one disk. The storage capacity of the array is reduced by one disk.
  • RAID 6 (striped disks with dual parity) combines four or more disks in a way that protects data against loss of any two disks.
  • RAID 10 (or 1+0) uses both striping and mirroring. "01" or "0+1" is sometimes distinguished from "10" or "1+0": a striped set of mirrored subsets and a mirrored set of striped subsets are both valid, but distinct, configurations.
The most common ones you'll probably see is RAID 0 & 1 and possibly 5. RAID 0 is useless to us and I'd actually recommend everyone stay away from it period, basically it makes 2 HDDs into one big one, the problem is that if either HDD fails ALL the data is lost!

For us either RAID 1 or RAID 5 is what we need, with RAID 1 you essentially have two mirrored HDD's that can be used to repair or recover the other HDD in the event that it fails or becomes corrupted. With RAID 5 its similar to RAID 1 except it uses 3 or more HDD's and protects against any 1 failing.

Redundancy costs money, for the HDDs it'll cost you double since you need twice the space. To have 1TB with a RAID 1 setup you'll need to buy two 1TB drives. You'll also need special hardware to manage the RAID setup, either a RAID controller in your PC or an external HDD enclosure that has a RAID controller built in. These are not cheap. As I write this the cost to put together an external HDD enclosure with two 1TB HDDs configured as RAID 1 its about $400CAN.

Based on the price tag the RAID solution may not be for you, this solution is more for the advanced hobbyist and professionals who earn money from their photography and can't afford to lose any photos.

In closing...
As I researched more and more about archiving in the digital era the more I realized that no one method is foolproof or permanent. With film the negatives can last for years, they may yellow or have colour shift but the image integrity is fairly good. With digital, when failure or corruption does occur, the results are normally catastrophic. CD's and DVD's degrade over time, the initial promises of 100years is definitely rubbish, HDD's are mechanical and fail over time and the platters lose their magnetism. Online backups can suffer server failures, though specialized online backup sites would probably have redundancy to protect from this. In the end you may want to make hardcopy prints of your most treasured photos as they will probably last the longest ;)

Hopefully this post wasn't too boring, I know it is a little lengthy and there were no pictures ;)

I'll post more as I go further with my archiving and learn more.

Tuesday, August 11, 2009

Digital Adventures In Infrared

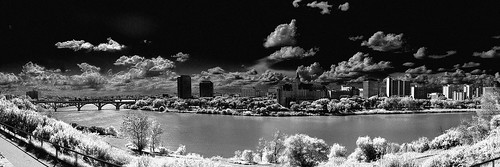
IR Test (River Pano 50%)
Test image taken with my Canon G10 using an 850nm IR filter, coloured in PS during post.

Infrared photography has always intrigued me, there is something about white trees and dark skies that brings a surreal nature to the images. With the dawn of digital cameras came the apparent dusk of IR photography, IR blocking filters that are installed on the sensors almost rule out IR photography entirely. There are still a few methods left and that is what this post is about.

The IR blocking filters, sometimes referred to as "hot mirrors" apparently are not all created equal. Here is a website that lists various camera's sensitivity to the infrared spectrum, unfortunately it appears to be a little dated but you can see the variance between cameras.

One quick way to see how sensitive your camera is to IR is to point your TV remote at the lens and see if you can see the IR LED light up when you press buttons on your remote. This is only the first step however, even if you see some light it still may not be sensitive enough but its a good start!

Assuming your camera has some sensitivity to the IR spectrum you can try what I did, purchase an IR pass filter for your camera. This filter blocks the visible spectrum and lets the IR light in. Filters are available in various wavelengths, in my case I used an 850nm IR pass filter.


Since we're blocking out quite a bit of the spectrum with the IR pass filter and since our internal filter is blocking a lot of the IR our exposure times will suffer. The image at the top of this article took 4 seconds at F2.8 with an ISO of 200 in the midday sun. Other cameras and filter combinations may yield different results but you should bank on having to bring a tripod, hand holding is simply not an option.

Another, more dramatic option, exists to enable your camera to take IR photos. There are companies which will take your camera and remove the IR filter or hot mirror from the digital sensor. This method has its pros and cons, it will reduce your exposure times greatly but can also limit your camera to only being able to take IR photos. It has also been noted that most cameras will have problems with their auto focus mechanisms due to the change in thickness of the filter over the sensor. Personally I'm not that big an enthusiast that I'll be sending in my 5DMKII any time soon.

Bez Infrared Cropped small
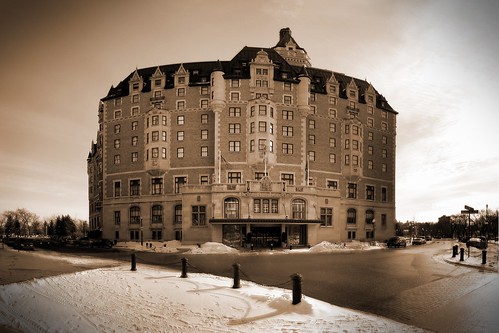
IR image faked in Photoshop

If you don't like either of these options you can always try to fake it using an image editing program like Photoshop or Gimp etc. While the results vary as much as the methods and the fact that it can be very time intensive it can yield some interesting images and give you another avenue if other options are not possible.

My Gear
I've been buying more and more stuff from this great Hong Kong based site, the other day I read an article that claimed people had success using IR filters on their G10 by use of a special adapter. I quickly checked out my Hong Kong connection and sure enough I found a 58mm filter adapter for $8 and a cheap IR filter for $19. So for approx $30 I was willing to take a gamble and it appears to have paid off!

Good luck!

Sunday, July 19, 2009

Everyone should have a pocket camera...

It doesn't matter if you have the most amazing whiz bang billion mega pixel uber-DSLR on the planet, it won't mean a lick if you don't have it with you when you need it. I don't know about you but my pockets aren't big enough to carry my 5DMKII around with me wherever I go and I probably wouldn't feel safe carrying it around everywhere anyway.

Enter the point and shoot camera, the much laughed at kid brother to our "serious" cameras. With technology getting better by the nano-second it might be time to re-evaluate the pint size light digitizer. There are a number of reasons to have a decent P&S around, the biggest is obviously size and portability.

Point and shoots are often relegated to candid snapshots at birthdays and drunken party picks etc but they don't have to be. In this post I'll speak out for the little guy and pitch it's story and hopefully sell you on the ideas and views I've arrived at.

1)Size - Obviously this is one of the biggest advantages that P&S camera have over their bulkier brothers. Small enough to fit into a shirt pocket, there is no reason why you can't have a camera on you at all times.
My SD780IS in a slightly modified Altoids Mint Tin - a nice cheap protective case

2) Video - While some video cameras moonlight as still cameras, often with very poor results, point & shoots do a marvelous job as video cameras for the average person's needs. The trend now is going towards HD video which makes them all the more attractive. There has been a few times when I've sent photos or video clips into the local news simply because I was the only one who captured a spur of the moment event. Case in point, a few weeks ago two moose wandered into our parking lot, on a whim I took a clip and sent it in. They ran it the next day and I then had the newspaper calling me to see if they could use it on their website. Did I get paid, no, but it got my name out there and maybe my website got a little boost in traffic.
Little clip from my SD780IS of two moose wandering into our parking lot at work

3) Macro - With their small lenses and sensors P&S cameras have an advantage when it comes to taking macro photographs. Its not unheard of to have a 1cm minimum focal distance when the camera is placed into macro mode.
<span class= <span class=
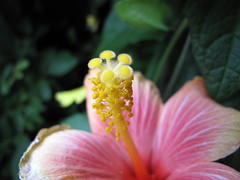
Shot with my G10 at the Mendel Conservatory

4) Photo-stitching - OK so maybe the little point and shoot is a little light on resolution, don't let that stop you from capturing a nice landscape shot. Instead of taking the shot in just one image zoom in and take 30 photos, once stitched together it could easily eclipse your DSLR.

Delta <span class=
Taken way back with my 3.2MP Canon SD200 this shot is made up of over 50 images stitched together.
Link to larger version which is still reduced by 50% or more

5) High-end P&S cameras- Don't want to leave the manual controls and external flash capabilities of your DSLR behind? Well there is still a market of high-end point and shoot cameras available. The Canon G series cameras for example are almost the go-to standard for reporters and journalists. Nikon and Panasonic also make models in this category as well so there are options even if you're not a Canon fellow like myself.

It's even possible to do a full fledged modeling shoot using one of these as is shown in this video.

6) Bells & Whistles - Lastly there are some new technologies emerging that can make your P&S even more versatile. Geo-tagging is just starting to catch on, companies like Eye-Fi are offering the ability to geo-tag your photos on the fly and upload them wirelessly to your PC or various photo sharing sites, all built into a little SD card. Nikon's P6000 is comparable to the Canon G10 but also comes with built in GPS for geotagging anywhere you can get a signal, this was enough to have my second guessing my G10 purchase.

In conclusion most people nowadays probably got their start in digital photography via a simple point and shoot, I know I did way back 2001 with a 2MP HP P&S. Often though people tend to overlook these cameras later on once they enter the DSLR world, hopefully this shows some reasons why you may want to reconsider them as viable photographic tools.

Sunday, June 28, 2009

Simple way to digitize slides

Old Slide Digitized Using A Canon 5DMKII DSLR

Growing up it was always fun when my Dad would break out his big box of old slides and show them when we had company over. Years have passed since the last time that happened and with my parent's 50th wedding anniversary around the corner I starting thinking about digitizing them for a DVD slide show. To my surprise (and horror lol) I found that my father has 1200 slides in total, much too many to scan one at a time in a flatbed scanner. After asking one of the local photo stores about the costs of bulk scanning slides and finding this was relatively costly I decided to try and find an alternative.

The answer, it ended up, was laying in my camera bag. The simplest solution is to just set up the projector and screen and take photos of the screen. The results will not be as high quality as scanning them but for viewing on a TV and making 4x6 prints the quality is acceptable.

*Note: I've since viewed the images on my 46" HDTV using my PS3 and the results don't look that different from watching them on the projector screen itself ;)

What you'll need:
1) Tripod - This is a must
2) Cable Release - While not absolutely necessary it can reduce camera shake and result in a clearer picture
3) A camera capable of long shutter speeds (even most point and shoot cameras allow this now)
4) Projector, Slides, and a Screen
5) A darkened room

Things to keep in mind:
This will be a little advanced so most camera's "auto" or "program" modes aren't going to cut it or will need some tweaking, you're probably going to have to dust off your camera's manual and give it a good read. Because we're shooting in low light you'd normally want to use a high ISO setting, however that degrades the quality of the image, since the subject isn't moving we can use a long shutter speed instead allowing us to keep our ISO low to preserve quality. Also you should try to limit any changes in camera position or projector position shot to shot, this will help you later if you have a means of automating your post production (via Lightroom or Photoshop).

Tips for point and shoot cameras:

  • Set your camera to the lowest ISO setting available (normally 80 or 100)
  • Turn your camera flash OFF
  • Use the self-timer function on your camera if you don't have a cable release, this will ensure your camera doesn't shake when the photo is taken. Some cameras have a 2sec setting as well as a 10sec setting, this is essentially the type of thing that the 2 sec setting is meant for.
  • If your camera allows for exposure adjustment (usually indicated by EV±) you can use this to tweak the exposure brighter or darker, use trial and error to get it right.
  • Limit the amount of zoom you use, the more zoomed in you are the more amplified any camera shake will be.

Tips for DSLR cameras:

  • Set the camera to the lowest ISO
  • Use an aperture that is big enough to let in a decent amount of light but small enough to ensure a depth-of-field wide enough so your image is still sharp and in focus.
  • Use a cable release or self timer to limit camera shake, also if your camera allows mirror lockup you should enable that to further reduce shake.
  • Limit the amount of zoom you use, the more zoomed in you are the more amplified any camera shake will be.
  • Adjust your shutter speed to control overall exposure, again this will probably be trial and error.
Tips for post production work:
The first 100 slides I did manually one at a time, cropping them and then adjusting colour levels to correct for the colour shift over the years. I quickly realized that this was very time consuming and was defeating the point which was to get a "quick and dirty" copy of the slides while maintaining an acceptable level of quality.

A program such as Adobe Lightroom allows you to copy and paste develop settings from one picture to others. Basically you spend the time doing it right on one picture and then you highlight the rest and apply the same settings. You'll have to do this twice though, once for portrait orientation photos and then again for landscape orientation. Instead of spending 2hrs on 100 slides I was able to process 500 slides in 1hr. You'll still have to go in to manually fix a few of them if the colour correction or levels are funky but its a great time saver.

The same (or better) results can also be achieved with photoshop by setting up custom actions and then running them as a batch, this method is more time intensive but will also allow you to correct for perspective distortion (not available in Lightroom) since your camera will be shooting up towards the screen instead of perfectly perpendicular to the screen.

Using this method I was able to capture 300 slides in a little over 1 hour (not including cropping them on the computer and correcting colour etc).

Have fun and good luck

Friday, May 22, 2009

Hair Salon Shoot

27 Models. 3 Days. 90 ft sq workspace on location. 20"x30" prints required.

Ad mock up showcasing some of the finished photos


I had been getting my hair cut at this place since highschool and after 6 years and countless business cards I finally landed the job. I'll admit that I was a little nervous but I new I had the technical skills and (most of) the equipment necessary to accomplish it.

Prep Work

What are the major considerations for showcasing hair and hairstyles?
  • Adequate back lighting to bring out the hair
  • Small apertures to ensure all the hair is tack sharp
  • Low ISO to preserve sharpness in poster size enlargements
  • Enough overall light to allow for the previously mentioned aperture and ISO
Considerations for this shoot in particular?
  • Long days full of shooting, will batteries hold up (both cameras and flashes)?
  • Do I need more memory cards?
  • Can the 40D handle 20x30 enlargements of portraits?
I am a worry wart by nature, because of this I often over plan things. In this case it proved to make things much much easier. The worry over batteries: I have 3 for my 40D which should suffice. Rechargeable AA's for the flashes? I don't know since I've never shot for 8hrs straight before, to be safe I picked up an extra 4 sets of 4 and 2 chargers (bringing my total to 8 sets). Memory cards: I should be good with two 4GB, a 2GB, and two 1GB cards plus my laptop to dump them if I need to. My Canon 40D handling enlargements: At first I wasn't sure, I had done landscapes that size but portraits seem to need to retain more sharpness. I decide to do a test print from a recent shoot and am content with the results, its on the upper limits of this camera but doable. Prior to the test print I was thinking about using my Yashica 635 medium format TLR, luckily I didn't have to (the film costs would have added up).
Over the last year I've been following the Strobist blog which really helped take some of the edge off regarding the lighting since I've learned quite a bit. Also as a result of that blog I have a pretty portable setup to draw on should I need it.

I realized that since I would be shooting on location I would need a suitable backdrop, initially I thought since the photos will be primarily head and shoulders I wouldn't need much for a backdrop. I figured that I'd just bring a white sheet and do the rest in post. Further thinking raised two questions: how professional is this going to look if I show up with a bedsheet backdrop and since I'm shooting at small apertures aren't all the wrinkles going to be in focus too? I could nuke it but I don't want risk to burn away the edges of the hair. OK so no bedsheet, I need a better solution. $215 later I'm a proud owner of a Cameron portable backdrop kit, with a 3 section crossbar it can accommodate a full 9ft roll or by taking a section out a half roll of seamless background paper. In addition I was pleasantly surprised to find that the two side poles were essentially lightstands, that was a bonus because I'd been wanting to pick up more. I've since found cheaper versions (i.e. less expensive, not quality) of this backdrop kit online at B&H and other places, I needed mine quick so I didn't have a choice.

Choosing a lighting setup

Now I've got the gear that I need to shoot this, I can start thinking more about the lighting configuration I will need. I've got two 400W studio strobes if I need them, however they are entry level ones and do not allow much control (full, 1/2, 1/4 that's it). I've also accumulated a number of flashes (damn strobist addiction) so I have a Canon 580EXII, 430EXII, 540EZ, and two Nikon SB-26's. For triggering I have 4 sets of YongNuo PT04TM "poverty wizards" and if I need to use it both of the Nikons have built in optical slaves.
Having not worked with the battery powered speedlights too much I really have no idea how fast the batteries drain. Because of this I start thinking it might be wise to bring in at least one of my studio strobes.

I decide to do a test shoot using one 400W strobe in a softbox directly above the camera and then a speedlight with a gridspot on it to kick up the hair. This allows nice soft lighting yet still allowing shadows to keep it interesting and three dimensional. A close friend of mine, and frequent guinea pig of mine, was nice enough to come over for a quick test shoot.

Test shoot to showcase hair 1
Lighting Test - Two Light Sources

Within a few attempts I managed to get the lighting roughly how I wanted it, there was nice a nice sheen to the hair and with the seamless background I could remove frizz if necessary.

At this point I can breath a little easier, I know my lighting setup now and should be ready to go.

The Shoot

A week later it was time for the main event, I was asked to come setup a day in advance. As it turned out due to a stylist going away on holidays the next day I was asked to shoot one model as well. This worked out to be a good test shoot to make sure everything was working, also since there was only one person there wasn't a rush. The shots turned out decent, I had highlights in the hair and the face was pleasantly lit. My stress level dropped significantly at this point.

That night as I was laying in bed I started to stress again for no reason. I figured I should put another speedlight on the other side to balance it out, if I found my batteries were depleting quickly I could get rid of it.

Revised setup: 1 Softbox above camera @1/2 power, 2 gridded speedlights behind model on opposite sides @1/8

This turned out to work better, the 2nd speedlight added more dimension to the photo. As you can see in the photo above I did not have much space to work with ;)

We had slated 30min per model which at first I thought was going to be pushing it, as it turned out each sitting only took 10-15min and I was getting 50-70 shots of each model. My fears regarding battery life turned out to be unwarranted. I could shoot most of the day at 1/8 power before my recycle time started to become an issue, at which point I simply tossed them in the charger and plugged in a new set. I only really needed the 4 sets I already had. Better safe than sorry. I should also point out that I had zero misfires with the cheap $20 per set wireless triggers I was using. Twice in three days I had them fire when I wasn't shooting but I'll take that over a missed trigger anyday, I highly recommend them. If you click the link it will take you to dealextreme, I should point out though I ordered my last 2 sets off ebay because dealextreme ran out. I was pleasantly suprised to find the ebay ones had pc sockets on the recievers which my earlier onese did not, these however were $30/set but worth it for the sockets.

Post Production
Minor adjustments in lightroom to correct the exposure and bring up any lost detail in the hair. The real work began in photoshop, aside from the standard "airbrushing" of blemishes etc the most challenging aspect was frizz removal. No matter how careful the hairstylist is there will always be some frizz, for these shots though I wanted them to look perfect. In the end I found going in by hand with the heal brush set to replace worked the best, it was tedious but it yielded great results. For the background I just made some arcs in white, blurred them out, then masked around the model. I actually made a variety of backgrounds but in the end the client decided to go with the "swoosh" for all of the shots. I was left to choose what background colour I thought would match the best. I tried to keep it subtle so as not to overpower the model, sticking to complimentary and analogous hues using the colour wheel.

Conclusion
When the dust finally settled I was quite happy with how everything turned out, most importantly however my client liked the photos and was happy with the outcome. The previous photos that were up in the salon I found to be a little too "safe", the background was pure white and the lighting too even. Coming into this job I wanted to set myself apart, use slightly more dramatic lighting to give dimension as well as kicking up the backgrounds a little. Hopefully in a few years I'll be asked to do it again, until then I never want to shoot 27 models in such a short period of time ;)

Wednesday, April 22, 2009

Camera bag of holding?


If you caught the joke in the title you're a geek ;)
I figured it was time to upgrade camera bags today, its not that my old one was necessarily too small but I knew for some gigs I'd need more than it could handle. My old bag was a Lowepro Slingshot 200AW, a phenomenal camera bag by any standards and probably one of the most popular ever. Its been halfway around the world with me, seen the heights of the Great Wall, survived airports and security checks, and never broke my back. I've decided rather than sell it I'm going to keep it for times I need a decently spacious bag that is still fairly lightweight and feels good on my back.

Ok, onto the new bag, like a kid in a candy store I was awestruck and the sheer selection in Don's Photo today. I gotta hand it to the staff there, they are nice and patient, helping me critique each of the many bags I looked through. I finally decided to go with the Lowepro Fastpack 350 because it fit my criteria which were:

A larger bag that could accommodate everything my current bag could plus 2 flashes & accessories
Hold a laptop
Still be comfortable to wear

I was amazed at all the crap stuff I could fit into this bag. Here's a list of what I managed to fit inside:

Canon 40D w 17-85mm lens attached
Canon G10
70-300mm zoom lens
50mm 1.8 prime lens
Lens Hood
Lensbaby 2.0
Loreo Beamsplitter (Lens for 3D photography)
Macro extension tube kit
4 YongNuo PT-04 wireless transmitters and receivers
3 DIY gridspots
2 Stoffen Omnibounce (3rd party $2 versions, I'm not paying $30 for a piece of plastic)
580EXII inside its fabric case
430EXII inside its fabric case
Off camera TTL cord
2 BP-511A batteries & charger
Manuals for both the 40D and 580EXII
Cable release
4 CF cards
Card Reader
Laptop w power connections
Rosco Gels sample pack
Lenspen
Misc cables & adapters
Bag of homemade Bongo Ties
Plastic rain sleeve
1 Roll of electrical tape

All of that and some room to spare. Man I hope I never get mugged carrying all of this ;)

Had I been thinking I would have taken some pictures as I was doing this, now that its all done I really don't want to unpack everything and take shots. I will try to update this post sometime in the future with photos.

Even with all this stuff its pretty comfortable on the back, the straps are well padded and so is the part that rests against your back.

Are there things I'd change about it? Sure, nothing is perfect, however they are all very minor (who decided two memory card slots were enough?) and can be worked around. One feature the Slingshot that is missing in the Fastpack is the rain cover, though I've never used it I found it reassuring to know it was there. Also, for some reason the model down from mine has a cell phone holder on the left shoulder strap, why is this missing on the next model up.

All in all I have very few gripes about this bag, its my 4th Lowepro bag and like all the rest the quality is superb. I don't think people buy new ones because they break, its either because of new features or just to upgrade size.

For tons of user reviews on both my new and old bags Amazon.com has tons, you can check them out by clicking on these links:
Fastpack 350
Slingshot 200AW

Friday, April 17, 2009

DIY Ringflash for approx $20


I actually made this tutorial by taking stills from sketchup google's free 3d rendering program. Its very handy for designing projects like this, it lets you see how everything is going to fit together first. Hope you like it, I'll hopefully post some sample images soon.

Tuesday, April 14, 2009

Blitzkrieg Shoot

So what do you do when a friend calls you up and says they need promo photos ASAP, you're working until midnight, and you don't have any gear with you? You say I'll meet you at 12:30am ;)

Luckily there wasn't really much pressure, they just needed 2 shots evenly lit at 300dpi so they could send them off to the event organizers for posters. I didn't even have to edit any of them.

Thank god I discovered the Strobist blog, if I hadn't I would not have had a portable rig to pull this off with let alone the lighting skills to setup, shoot, and tear down in 30min. After work I sped home and grabbed two light stands, my 580EXII and 430EXII, my "poverty wizards" and two shoot thru umbrellas. All stuff I could carry on my own and load into the car in one trip. Portability rocks!

My friend had mentioned the gym is in a basement but that it was really well lit. Never trust the client's ability to guage lighting conditions. It was plenty bright enough for training etc but not for photos if I wanted to shoot at a high enough fstop to get detail and low enough ISO for tight grain.

I new they wanted these for promo posters so I wanted to keep the fighters fairly evenly lit so that they could be removed from the background if need be. I decided to go with my new-found favorite lighting setup "the clamshell" configuration. With this setup you have two umbrellas stacked vertically and you shoot through the gap in between. It essentially makes it look like the person was standing infront of a 9'x3' softbox.

The shots they needed were pretty dull as far as lighting goes so after burning the disc off I decided I'd edit two quickly just for the fun of it.

Since fighting is a harsh and violent sport I decided to pump up the clarity slider in Lightroom, something I normally don't do (too many amatures are trying to fake the "Dave Hill look" that way) however I felt in this circumstance it would work.

Once I got them into photoshop I needed to do something more dramatic with the lighting. Awhile back I read an article about the light renderer in PS and how it could actually be useful. I finally tried it on a few photos and it actually works pretty decently. For these I set a spotlight up on the top right shining down diagonally across the photo.

At this point I pretty much had the shot where I wanted it but I thought I'd try for a little more of an edge. I duplicated the layer and added a high pass filter to it dialed in just to enhance some of the fine edges, then set the layer blend to overlay. Its important to desaturate the hipass filter layer too because it tends to greatly amplify colour noise.

Voila, 2 poster quality shots with minimal editing all from a shoot that was 30min from setup to tear down. I know I could have done much better given more time and a licence to edit but it wasn't what the customer wanted. These two shots were just a fun bonus I later emailed to him incase they could use them.


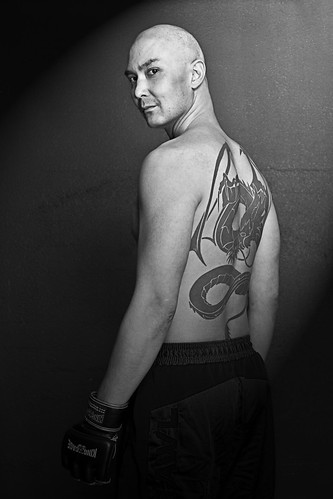
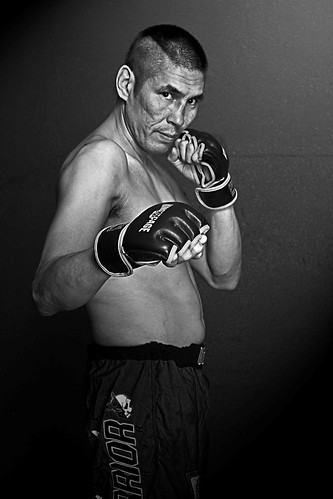
Fight Pics-11-Edit BW
Dave from "Way of the Dragon Martial Arts" based in Saskatoon

Fight Pics-27-Edit BW Crop
Elmer also from "Way of the Dragon Martial Arts" based in Saskatoon

Monday, April 13, 2009

DIY Ringflash - My Experience

Here is the version I made. Link to step-by-step instructions coming soon.


Ringflashes, they always produce such a cool look. With a lure of nice even wrap-around lighting beginners to "off camera lighting" are often disappointed to find out how much these can cost.

Enter the realm of the do-it-yourselfer, a quick google search will yield all sorts of ringlight contraptions. Recently two products have emerged to fill the niche for budget ringflashes, the Rayflash and the Orbis Ringflash, both seem to be derived from DIY projects. Both of these, like so many of the DIY versions rely on light from a Speedlight style flash, because of this they still aren't a genuine replacement for a real pro ringflash.

Last week I walked into the local photo store and saw that they had some Rayflash units in, I was immediately intrigued. After asking the salesperson to grab one for me I opened the box to see what all the fuss was about. There was no chorus of angelic voices, no warm soft glow emanating from the box lighting up my face, there was only a cheap feeling plastic ring. Now I'll admit the that it looks like it will do the job but really $300 CND? All it is is plastic, plastic that bends the light from your flash at 90° then channels it around your lens via lightpipes. Maybe I'm too critical, I just think this could be priced more reasonably at $100-$150 and this Ray guy would still be rich ;)

I haven't yet seen one of the Orbis Ringflash units up close and personal, from what I can gather its priced pretty close to the Rayflash. The Orbis design is more like the one I made, a ring with a hole at the bottom to shoot your flash into. It also appears to have some "trick" for bending the light around your lens. Regardless both are overpriced in my opinion but if you aren't much of a tinkerer or just don't have the time to try making your own they might be right for you.

Setting out to make a ringflash

I'm not going to go into full instruction mode in this post, instead I'll save that for my post on www.instructables.com and just update this post with a link to it.

Over the last 6 months or so I've been infected with Strobisitis a condition that afflicts photographers that accidentally stray to strobist.com and see the world of portable off-camera lighting. I went into a flurry of DIY mayhem putting together snoots and grids, bounce cards, and finally stumbling upon the beauty dish. The light from a beauty dish is similar to a ringflash but its still not "on axis" since you're not shooting through it. I did not know how big to make the beauty dish so I had made up 3 variations using different bowls I had picked up at the local $1 store. For months this former Halloween treat dish sat nicely painted just waiting to be used or tossed away. This was its chance.

Inspired by this guy's rig that was posted here at strobist.com I decided to make my own attempt. For my version I decided I wanted to use a diffuser on the front to try and even out the light a little more, I also wanted to include a bracket like this guy did.

I had the bowl, I had spray paint, I still had white nylon leftover from a semi-successful softbox attempt. I even had the aluminum stock from a previous project, now all that I needed to do was mash the stuff together.

For the center whole I ended up using a plastic peanut butter jar that I cut the ends off of. The fabric diffuser actually worked out without a hitch (had to bring it to my mother to sew though ;) and I managed to get the brackets bent properly on the first try.

Front and side view of the DIY ringflash. The bracket still had to be painted black.

Quick test shot of my nephew as he walked in the door.

I'll put up some real test shots later but this showed me that the light distribution was pretty even. The non-flash side is a little darker but there are a few things I've still yet to try to even it up. For around $20 of material I'm pretty happy with the results.

Friday, April 10, 2009

Fakin' It - Polaroid Transfers That Actually Look Real

Example using border created in this tutorial.
Parchment texture overlayed*
*
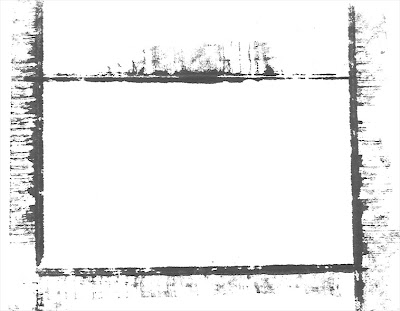
You can download the border template here

Some of you may or may not know what polaroid transfers are. Those that have done actual transfers may scream blasphemy!!! while those who haven't may rejoice in finding a decent tutorial on how to replicate the effect.

A polaroid transfer is made when the normal development process of the polaroid is interrupted and the image is instead placed on a different medium (normally paper). Normally heat and pressure is applied to encourage the image to bond to the new medium. This is all what I'm told, I've never had the pleasure of actually doing this, unfortunately Polaroid announced that they are no longer going to be making film so I may never get the chance. Lucky for me (and you) there are still ways to keep the look alive through the modern wonders of photoshop.

I was recently working on a shoot where the editing was leading me down a path that made the photo look a little "grungy" and I thought a polaroid border would suit it well. I knew at one time there was some nice soul who had posted up a psd template that was an actual scan of a blank polaroid transfer so I started looking. After 2hrs and many stock photo sites that were selling exactly what I was looking for I decided photographer/graphic designer/photoshop fiend would I be if I simply purchased this file. Luckily I stumbed across a post that mentioned using ink and some watercolour paper, thats all I needed to read and I was off to find the box with my drawing stuff.

This process is quite simple, there are probably a multitude of ways to do this and I encourage you to tailor this process to your own style.

Materials

  • 1 or more sheets of watercolour paper - others may work but watercolour paper has a nice texture
  • Ink of some sort. I used fountain pen ink but you could probably use all sorts of other stuff like food colouring or maybe even fabric dye just make sure it is dark. Get creative. It doesn't have to be black, we can fix that in photoshop.
  • 1 or more popsicle sticks - again other stuff could work, just get someting with a flat edge that you can use to transfer the ink.
  • Scanner - If you don't have one see if you can scan documents to file using the copier at work. If all else fails I don't think Office Depot or Staples charge that much for this service.
  • Image editing software that supports layers. Photoshop is preferred but GIMP (which is free) will work too. This tutorial however will be citing photoshop tools/commands only.
Making The Raw Border

Step 1
Prepare your work surface. Lay down some newspaper so you don't get ink on your table. It may also be a good idea to wear some old clothes just incase you splatter yourself.

Step 2
Prepare your palette. Just like an artist has a palette we need one too, something to put the ink onto. Use a separate piece of paper or an old margerine container lid, the margerine lid is better since it won't soak up the ink on you. Spread the ink out in a line on your makeshift palette.

Step 3
Run the edge of your popsicle stick lengthwise along the line of ink so that the whole edge is saturated.

Step 4
Place the ink onto your watercolour paper and gently rub it lengthwise back and forth while slowly pulling it towards you then slowly pushing it away from you. The idea is that as there is less ink it will start to leave voids and you'll get that "rough" look.

Step 5
Repeat for the remaining sides of your border. You may want to take another popsicle stick and break 1/3 of it off to use the remaining 2/3 section for the short sides of your border, this will give you a proper aspect ratio for your border. When I did it I wasn't that fussy, I knew I could correct the aspect ratio and more in photoshop. In the example below I didn't care that my "short sides" extended past the corners because I knew I would be erasing away the parts I didn't like.


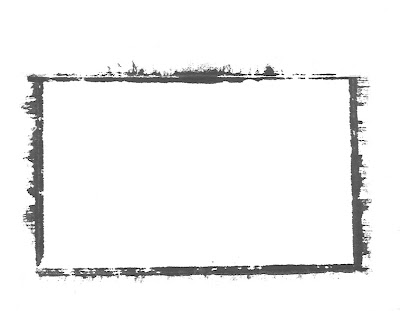
Raw scan of a border.


Post Processing

Step 1
Scan your raw border(s) at as high a dpi as you can, if you're taking the time to do this right you'll want quality borders that you can use with future cameras that may be higher resolutions.

Step 2
Open the scan in Photoshop. Perform any straigtening/rotating you may need to. If your ink wasn't black press shft-ctrl-U to turn it black and white, or you may want to see how it looks as is first.

Step 3
Cleaning up the image. Use the eraser tool and first select a large brush with a hard edge, then start erasing away the unwanted areas. You may want to try one of the brushes that looks like spraypaint, this will give you a more irregular shape.Border cleaned up using eraser tool

Step 4
Crop the image down to get rid of the excess white border (the border around our border ;)
How much you crop is up to you, maybe you only want the inner border left or maybe not. Its up to you.
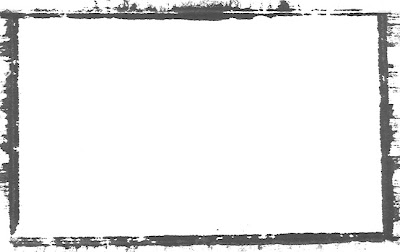
Border Cleaned & Cropped

Step 5
We now need to see how this is going to look. Duplicate your layer and name it "Polaroid Border Black". Set the blend mode to "Multiply". Then select your old background and delete the contents leaving a blank layer (click on background layer, then CTR-A, then delete). Now fill that layer in with a beige colour just so we can see how our blending will work.
You should now have something like this

Step 6
Some people might stop here and you're welcome to if you'd like however I want to add a little more realism to the border. If you're with me, click on the Polaroid Border Black Layer and duplicate it, name it Polaroid Border White.

Step 7
Invert the colors of the new border by holding Ctr then "i", now change the layer blending mode to "Screen". Don't worry it's going to look a little strange at this point.

Step 8
With the "white" layer still selected press Ctr-A to selecte the entire canvas, then under the edit menu at the top of the screen choose Transform>Rotate 180°

Step 9
This looks better but the layer order is wrong. Drag the "Polaroid Border White" layer between the black border and the background layer.
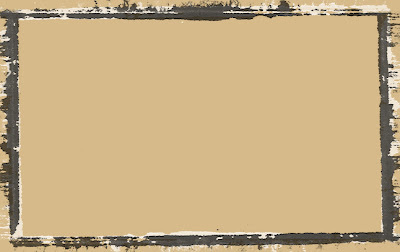
This is what you should now have roughly

Step 10
At this point the border is pretty much finished, if you want you can erase away different sections of the layers to "tweak" it a little more and you can play with opacity. When I do this I like to have an actual image under the frame so I can see what to tweak. Once the adjustments are done save this as a PSD file so that you can always change the different layers if you want to.


Using The Border

Step 1
Open up an image that you want to apply the border to and note the dimensions. For this example I'm using the full resolution of my Canon 40D which is 3888x2592.

Step 2
Now we're going to try to match your border to the image size your camera takes, however we want to make it just a little bigger so that the border isn't encroaching on your photo too much.
Open your Polaroid transfer border and select Image Size front he Image menu at the top of the screen. Determining the right size is tricky and may take a few attempts, start with your the dimensions from step 1 then add an extra 10% to the width and about 6% to the height. Make sure you uncheck "Constrain Proportions" box. Paste your camera image into the border and make sure the border overlaps it but that the image doesn't extend past the border. If it doesn't just "undo" back to the re size and try again. For me a good number worked out to be roughly 4120x2860 which is where I got the 10% and 6% from. Once you have it right, delete the image layer leaving only the borders and the background, change the background colour back to white, and save it as a psd file.

Step 3
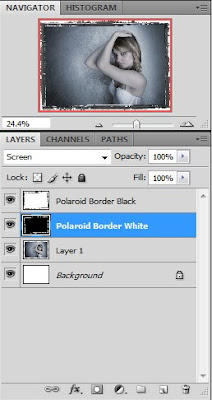
Now you're ready to use it with any photo however every time you use it you will have to paste your desired image into the Polaroid frame. Make sure when you paste the photo in that you move the layer so that it is just above the background layer.
Here "Layer 1" is the photo placed correctly in the layer orders.

Step 4
Once you have it lined up right choose the SAVE AS command to save so that you don't overwrite your template file.


Troubleshooting
There are 2 main things that can go wrong, both are easily fixed.

1) Your black border is too transparent even though the opacity is set to 100. If this happened its because your ink wasn't dark enough, to fix this select the black border layer and press Ctr-L to bring up the levels tool. Adjust the black slider to bring it up to a true black.

2) Your photo extends past your border but only in a few spots. Easy, just erase it away.

** The example at the top follows all the steps to the end with the added step of using additional layer containing stained parchment. This is a texture layer that was blended using multiply, opacity set to 50, and masked off to avoid contaminating the model's skin.

Saturday, February 7, 2009

Just when I'd lost faith in customer service...

**This is a bit of a long rant and if you don't read the whole thing you may get a bad opinion of the EyeFi company, I just want to state here that I fully recommend their innovative product. I had a bad experience at first but their amazing customer support rectified the problems and then some.**

I've been having real bad luck lately with products and services. It seems everywhere I turn its as if I'm being given the "priviledge" of spending my money instead of the stores being greatful to have me as a customer. I've seen a drop in service everywhere ranging from getting a burger in a drivethru that was missing the most important part, the meat patty, to waiting 3 months for an order to ship. I starting thinking that maybe the economic crisis might actually be a good thing, the companies that don't wise up will simply be replaced by the ones that do because the others will be filing for bankruptcy.


"Where's the beef?"


It was with this gloomy picture in my head that I decided to purchase one of the new Eye-Fi SD cards for my camera. If you haven't heard of them I suggest you check out their site at www.eye.fi They have an ingenious little product that will automatically upload the photos from your camera to your computer (and photo sharing sites like Flickr etc) and geotag them so you know where you were when you took them.

Upon purchasing a card I was immediately greeted with a defective card reader that came with the card. Not a huge deal since I have multiple readers. I notified customer service and requested a replacement. I was later told that a replacement was issued and would be shipped to the address I provided. Ok. Great.

I then took advantage of thier "suggest a feature" in the Eye-Fi forums. I suggested that they offer a free trial for their Geotagging service. As I had only bought the EyeFi "Share" model my card did not have this feature though a 1yr subcription was available for a small fee. Since the geotagging feature works best in densly populated urban areas I did not want to take the plunge and go for a full year only to find out it didn't work. A few days later I had a reply stating they liked the idea and would let me know when this was available. A few weeks later and I was given instructions on how to access my free trial. I still had to provide a credit card number so that if I liked the service it would automatically subcribe me for 1yr if I did not cancel before the end of the 30 days. Fine, sounds reasonable, I'll do it. I try out the service over the Christmas holidays and I find it neat but given the small size of my city there was not enough wifi coverage to always get an accurate geotag. I decided in the end to hold off a little while, cancel my trial, then maybe renew it if I new I'd be going on a trip.

This is where I got frustrated. I could not find a way to cancel the trial so I had to email support, ok no big deal. I received a repsonse saying my autorenewal had been cancelled and that I would not be billed for the 1yr subscription. A few days later I receive and automated email stating that my autorenewal had just been completed and I was now subscribed for 1yr. Ok, maybe they forgot to cancel the automailer no big deal. Fast forward a few days again and I see it on my bank statement. I now was billed for a service I cancelled and to top it off I couldn't even use the feature because it had been disabled in my Eyefi account. This is when I lost it. I wrote a lengthy email explaining just what happened to me from the beginning of my whole experience. I was not vulgar, I did not swear, but I was maybe a little scathing albeit in an articulate fashion. Then I waited.

Later that same day I saw an email pop up in my inbox from Eyefi, to be honest I wasn't expecting much. I was wrong, not only did they address all of my problems and refund my autorenewal, they went on to apologize for my experience and to make up for it sent me an EyeFi Explore card (the step up from mine) that has unlimited geotagging. I was floored, I wasn't expecting this at all. Most times its hard enough to get what is owed to you, very seldomly do you also get compensated for your troubles.

Now I don't want people expecting to get free stuff from EyeFi or any other company by writing letters complaining about stuff. I know there are people out there who would try to take advantage of something like this and perhaps even lie to do so. Please do not do this. I would however say that you should give feedback, both negative and positive, when it is due. Stand up for your rights as a consumer, it is ok to complain if it is warranted. On the flip side, if a company has a good product or you've had a great experience dealing with them by all means spread the word and help them out!! Its by doing this that you'll help the companies that are worth keeping stay around while the out of touch companies file for chapter 11 bankruptcy.

I plan on posting a full review of the EyeFi card in the next few days. I won't pull any punches just because of the great service I got, there are a few things I'd change with the product but all in all I would still highly recommend it. Stay tuned to find out why.